Scheduling a Single Showing
There are two ways to schedule single showings. Both provide the same features - you choose the easiest way to access it.
Through your MLS
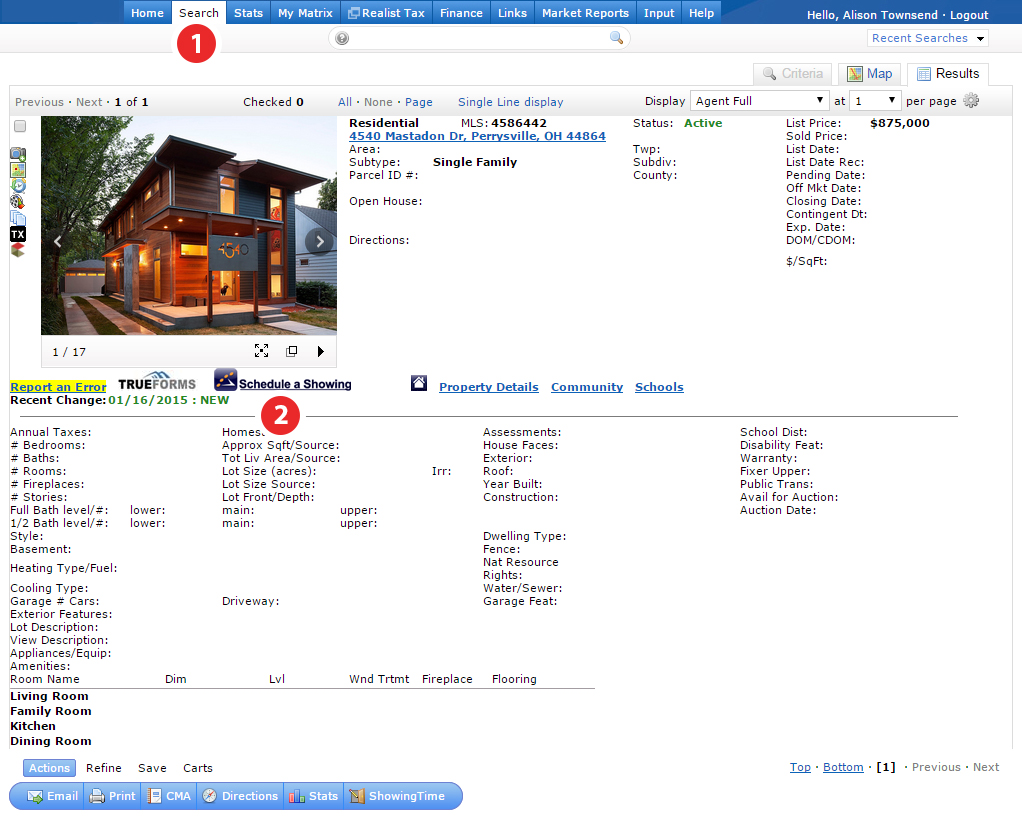
Step 1
Login into your MLS and find the listing.
Step 2
Click on the Schedule a Showing link, which will take you to ShowingTime's scheduling screen.
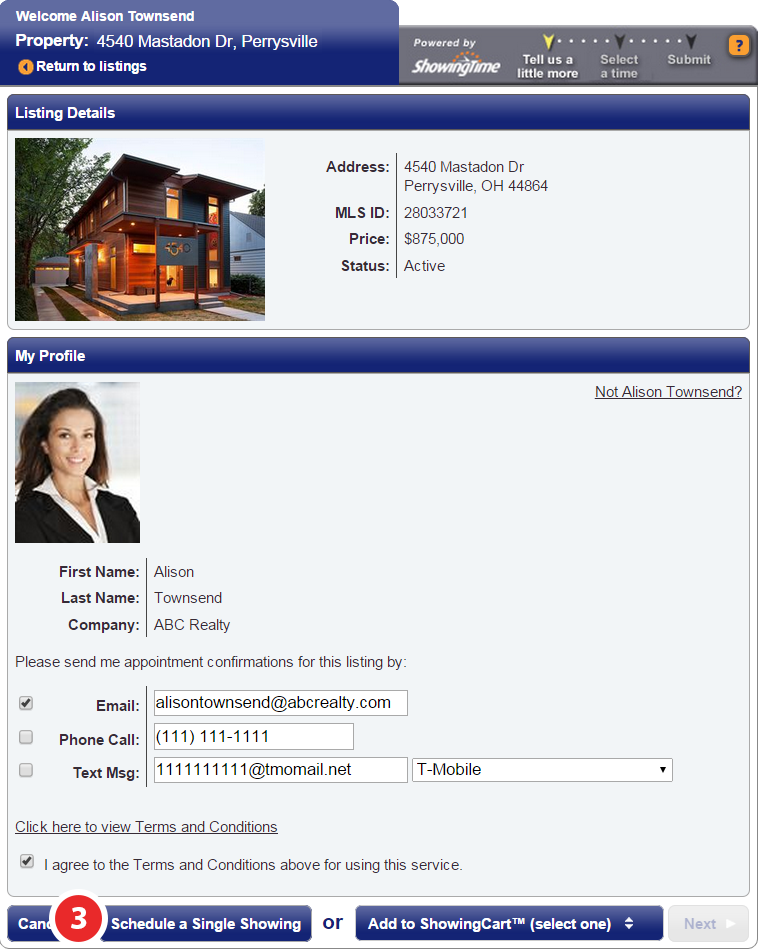
Step 3
Review the listing details, confirmation preferences, and agree to the terms then click Schedule a Single Showing.
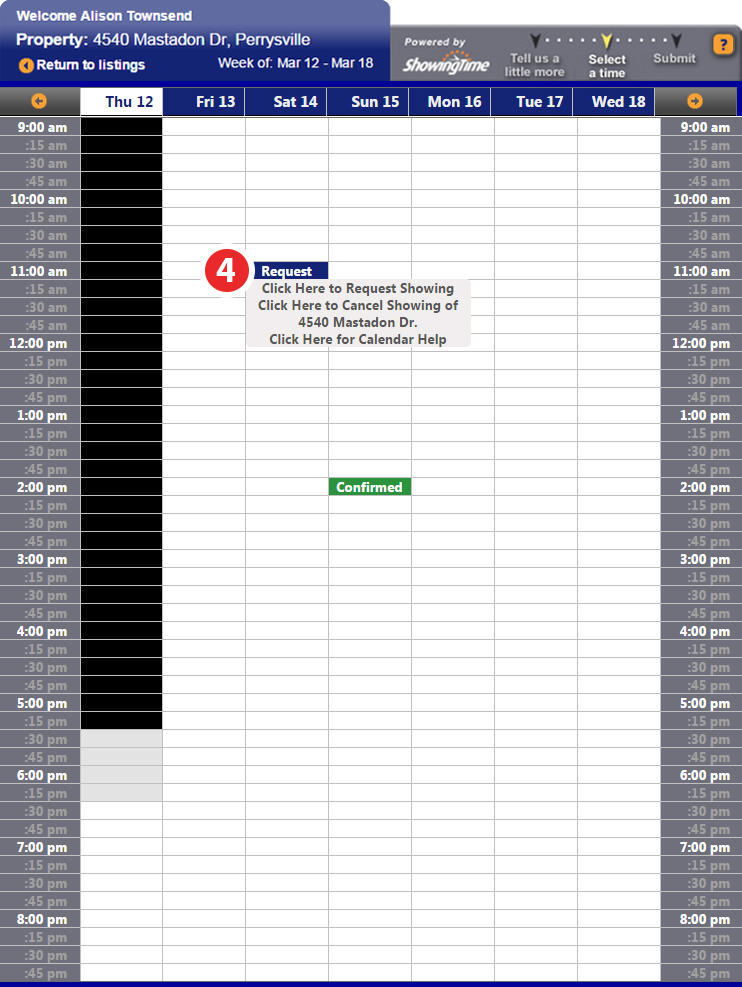
Step 4
Select the date and time slot you would like to request.
- White is available
- Gray is 'Suggested Lead Time'
- Black is any time that is unavailable, including 'Required lead Time', 'Showing Restrictions', and time that is in the past
- Shaded boxes indicate that a minimum appointment length may prevent you from scheduling an appointment.

Please Note: Your appointment time may not be exclusive to you. Some listings can be set to allow overlapping showings.
Step 5
Verify your appointment details, then click Yes.
You can choose from several different Appointment Types
For more information on adding Buyers, please click here
Note: Agency Type and Buyers Name may be required in some markets.
After you have scheduled your appointment you will be presented with one of the two following status notifications:
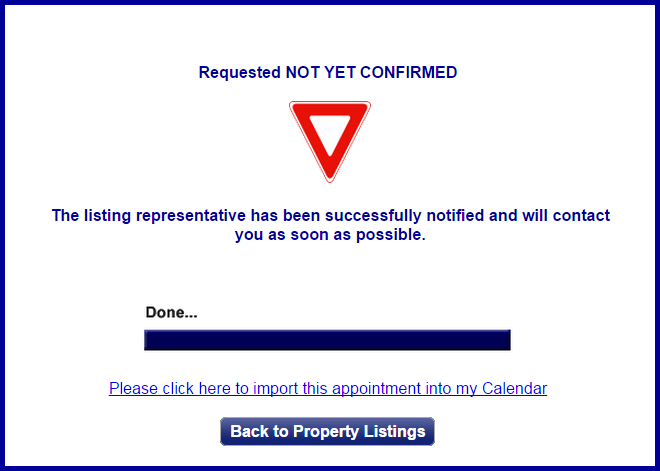
Populates when the appointment requires confirmation from any/all contacts
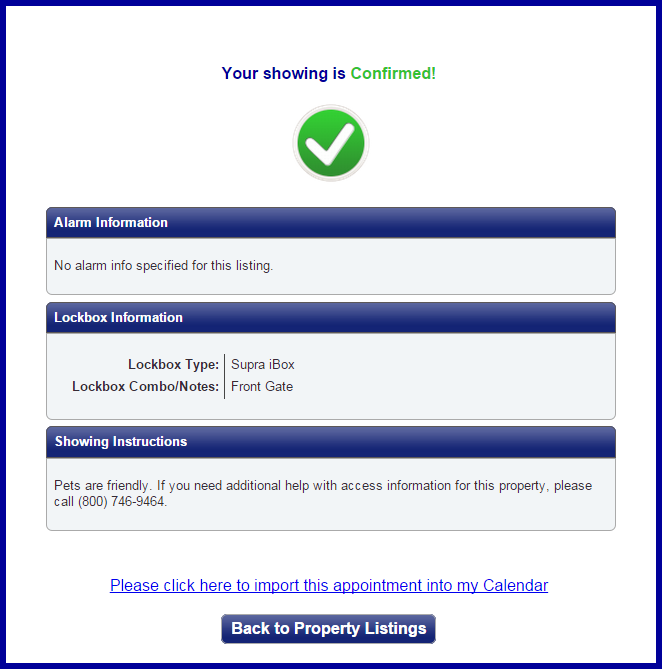
Populates when the appointment does not require confirmation.
Through ShowingTime
Step 1
To get started, Authenticate into ShowingTime through your MLS, then click on My Appointments on the menu bar or choose an appointment type from the main menu.
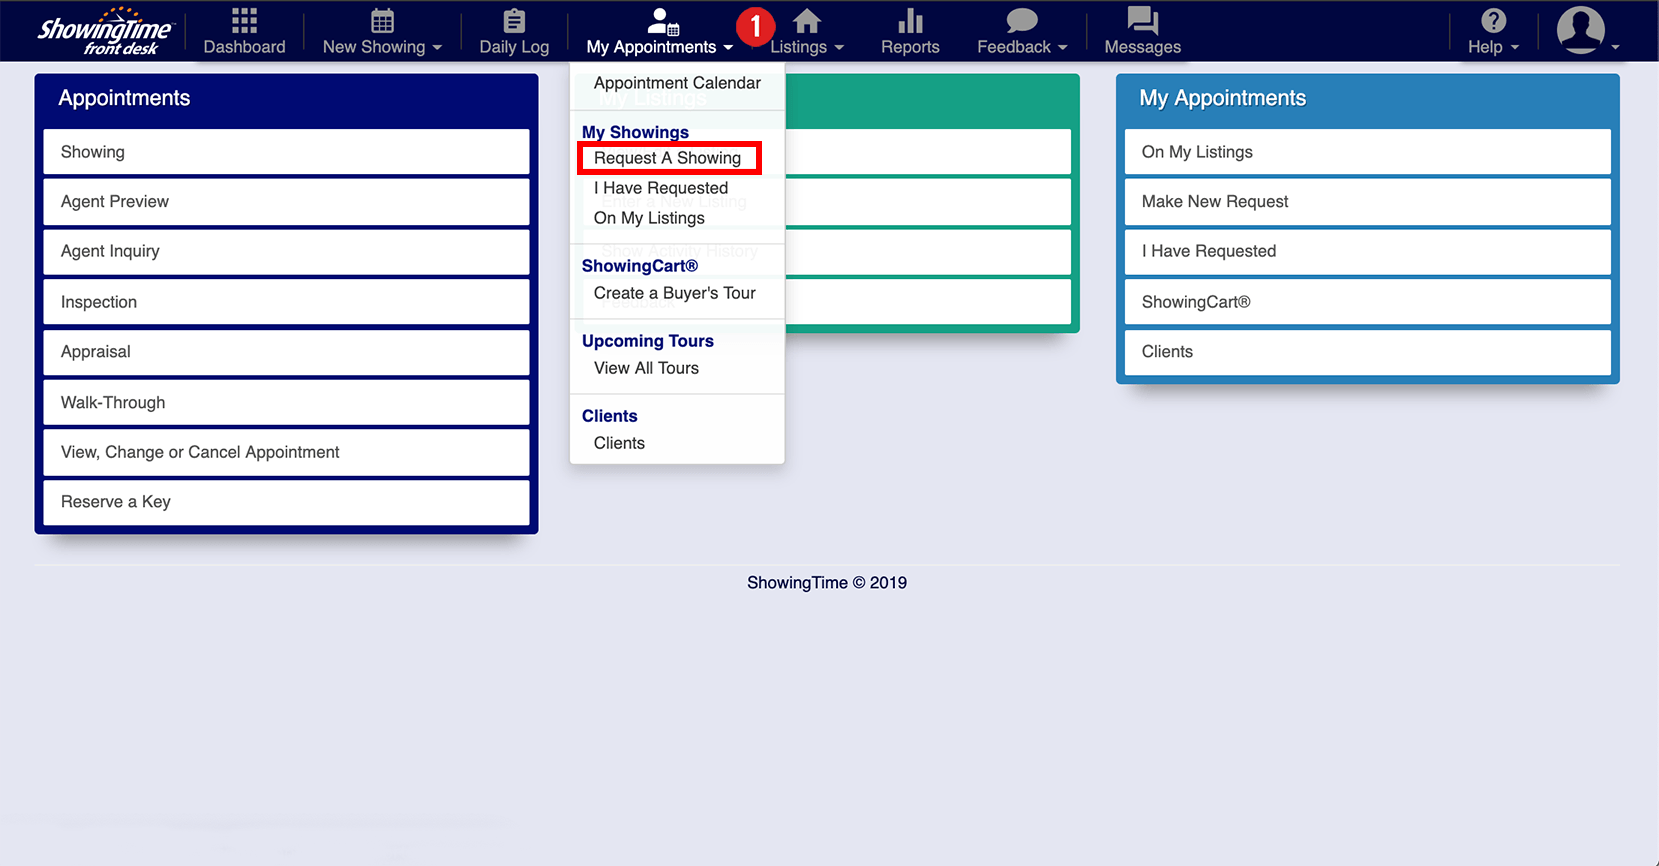
Click image for full size
Step 2
Choose Request a Showing.
(Alternately: Clicking the 'Schedule a New Showing' button on your agent homepage will link you to the same screen.)
Step 3
Search for the listing using the Street Number, Street Name, City or MLS Number.
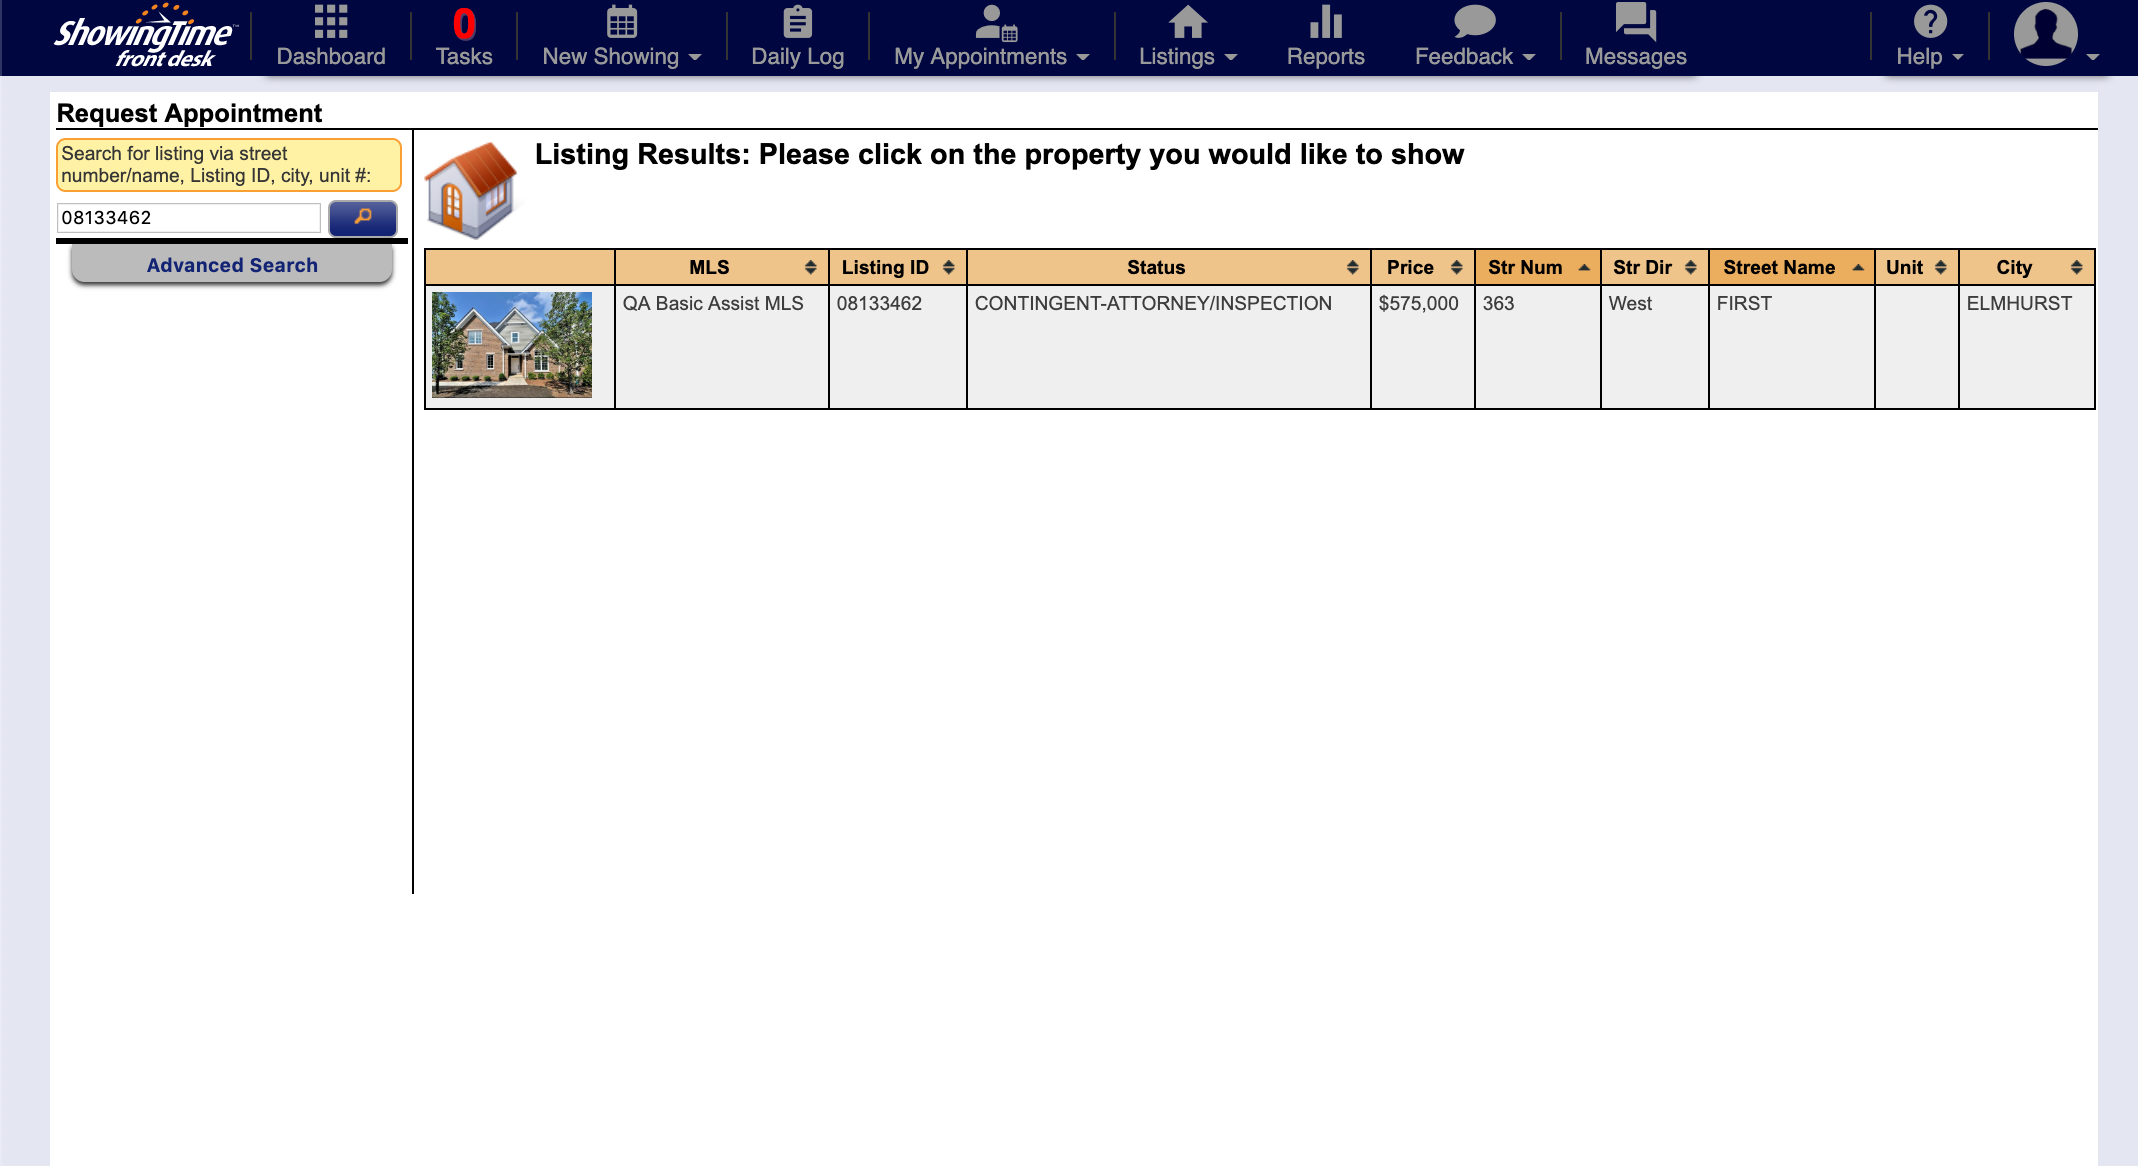
Step 4
Select the listing to schedule a showing.
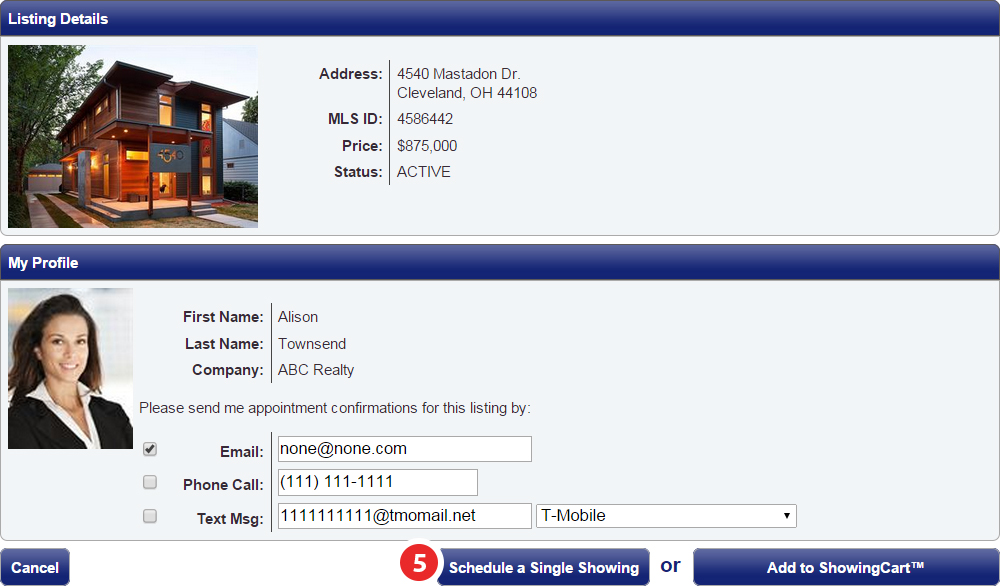
Step 5
Review the listing details and your confirmation preferences, then click Schedule a Single Showing.
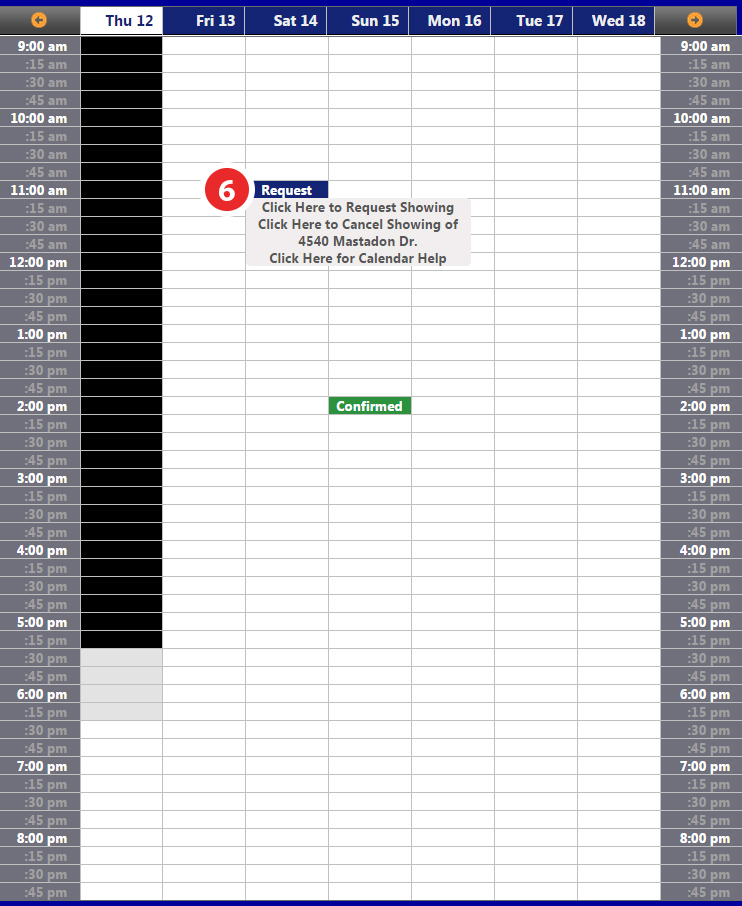
Step 6
Select the date and time slot that fits best.
White is available
Gray is 'Suggested Lead Time'
Black is any time that is unavailable, including 'Required Lead Time', 'Showing Restrictions', and time that is in the past
Shaded boxes indicate that a minimum appointment length may prevent you from scheduling an appointment.
If you have already made a request on the listing, you can access it from this screen and make changes as necessary.
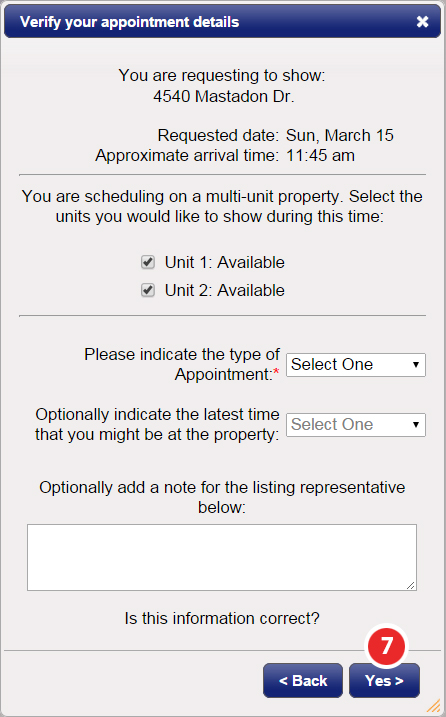
Step 7
Verify your appointment details, then click Yes.
(If you are scheduling on a multi-unit listing, you will see the display of unit options to select in which you would like to show during your time selection)
For more information on adding Buyers, please click here
Note: Agency Type and Buyers Name may be required in some markets.
After you have scheduled your appointment you will be presented with one of the two following status notifications:

Populates when the appointment requires confirmation from any/all contacts

Populates when the appointment does not require confirmation


