Pre-Scheduling Form
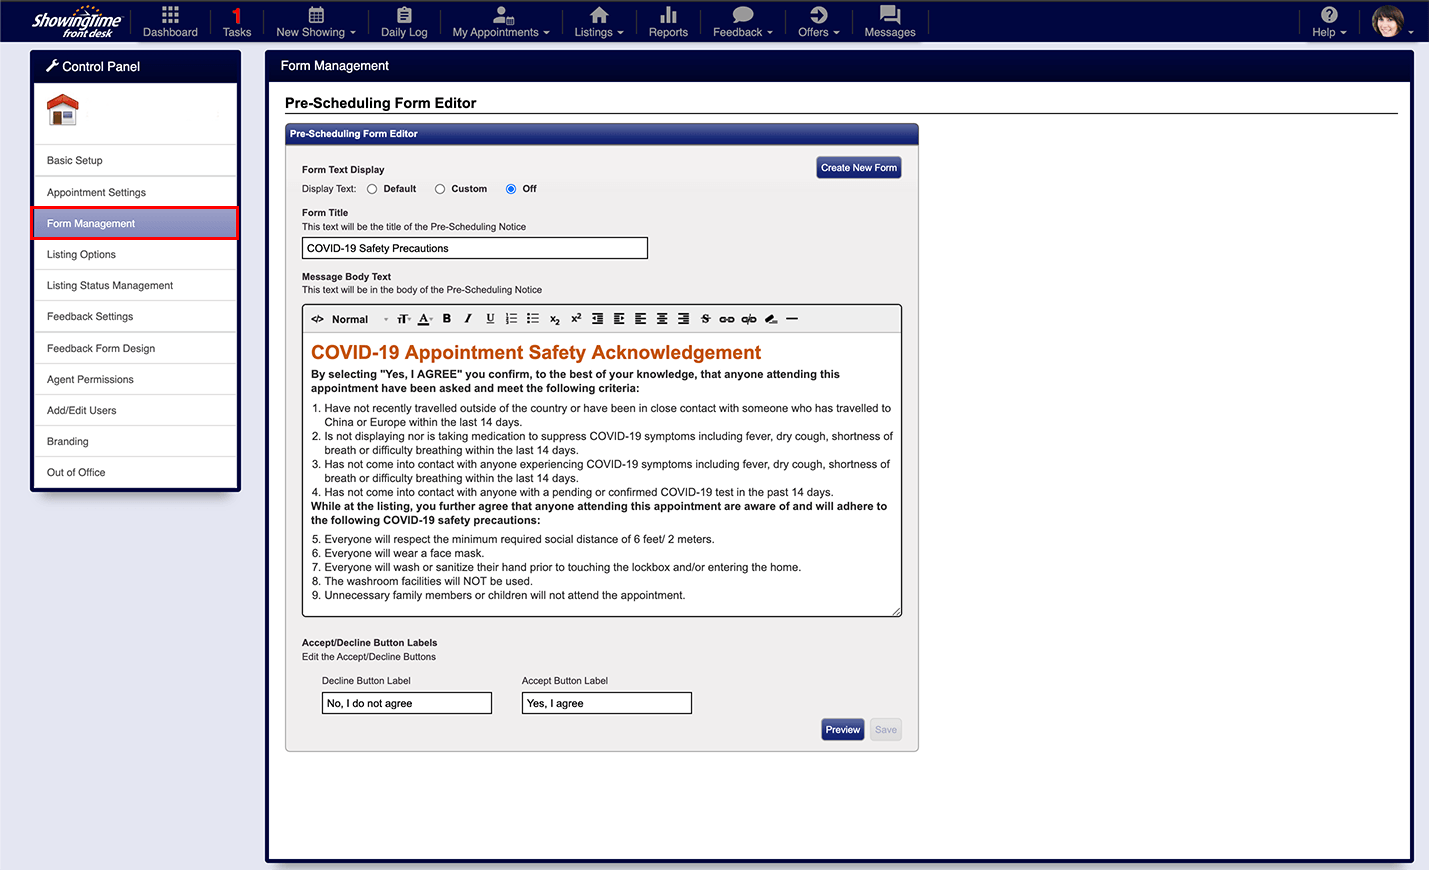
The Pre-Scheduling form editor is available to office staff and managers. You can find this form under the Form Management menu option in the ShowingTime Front Desk Control Panel.

Typical usage of this form is a Covid Safety Acknowledgment message, but you can use it for waivers or other messages.
Frequently Asked Questions
The form editor is not available in all markets

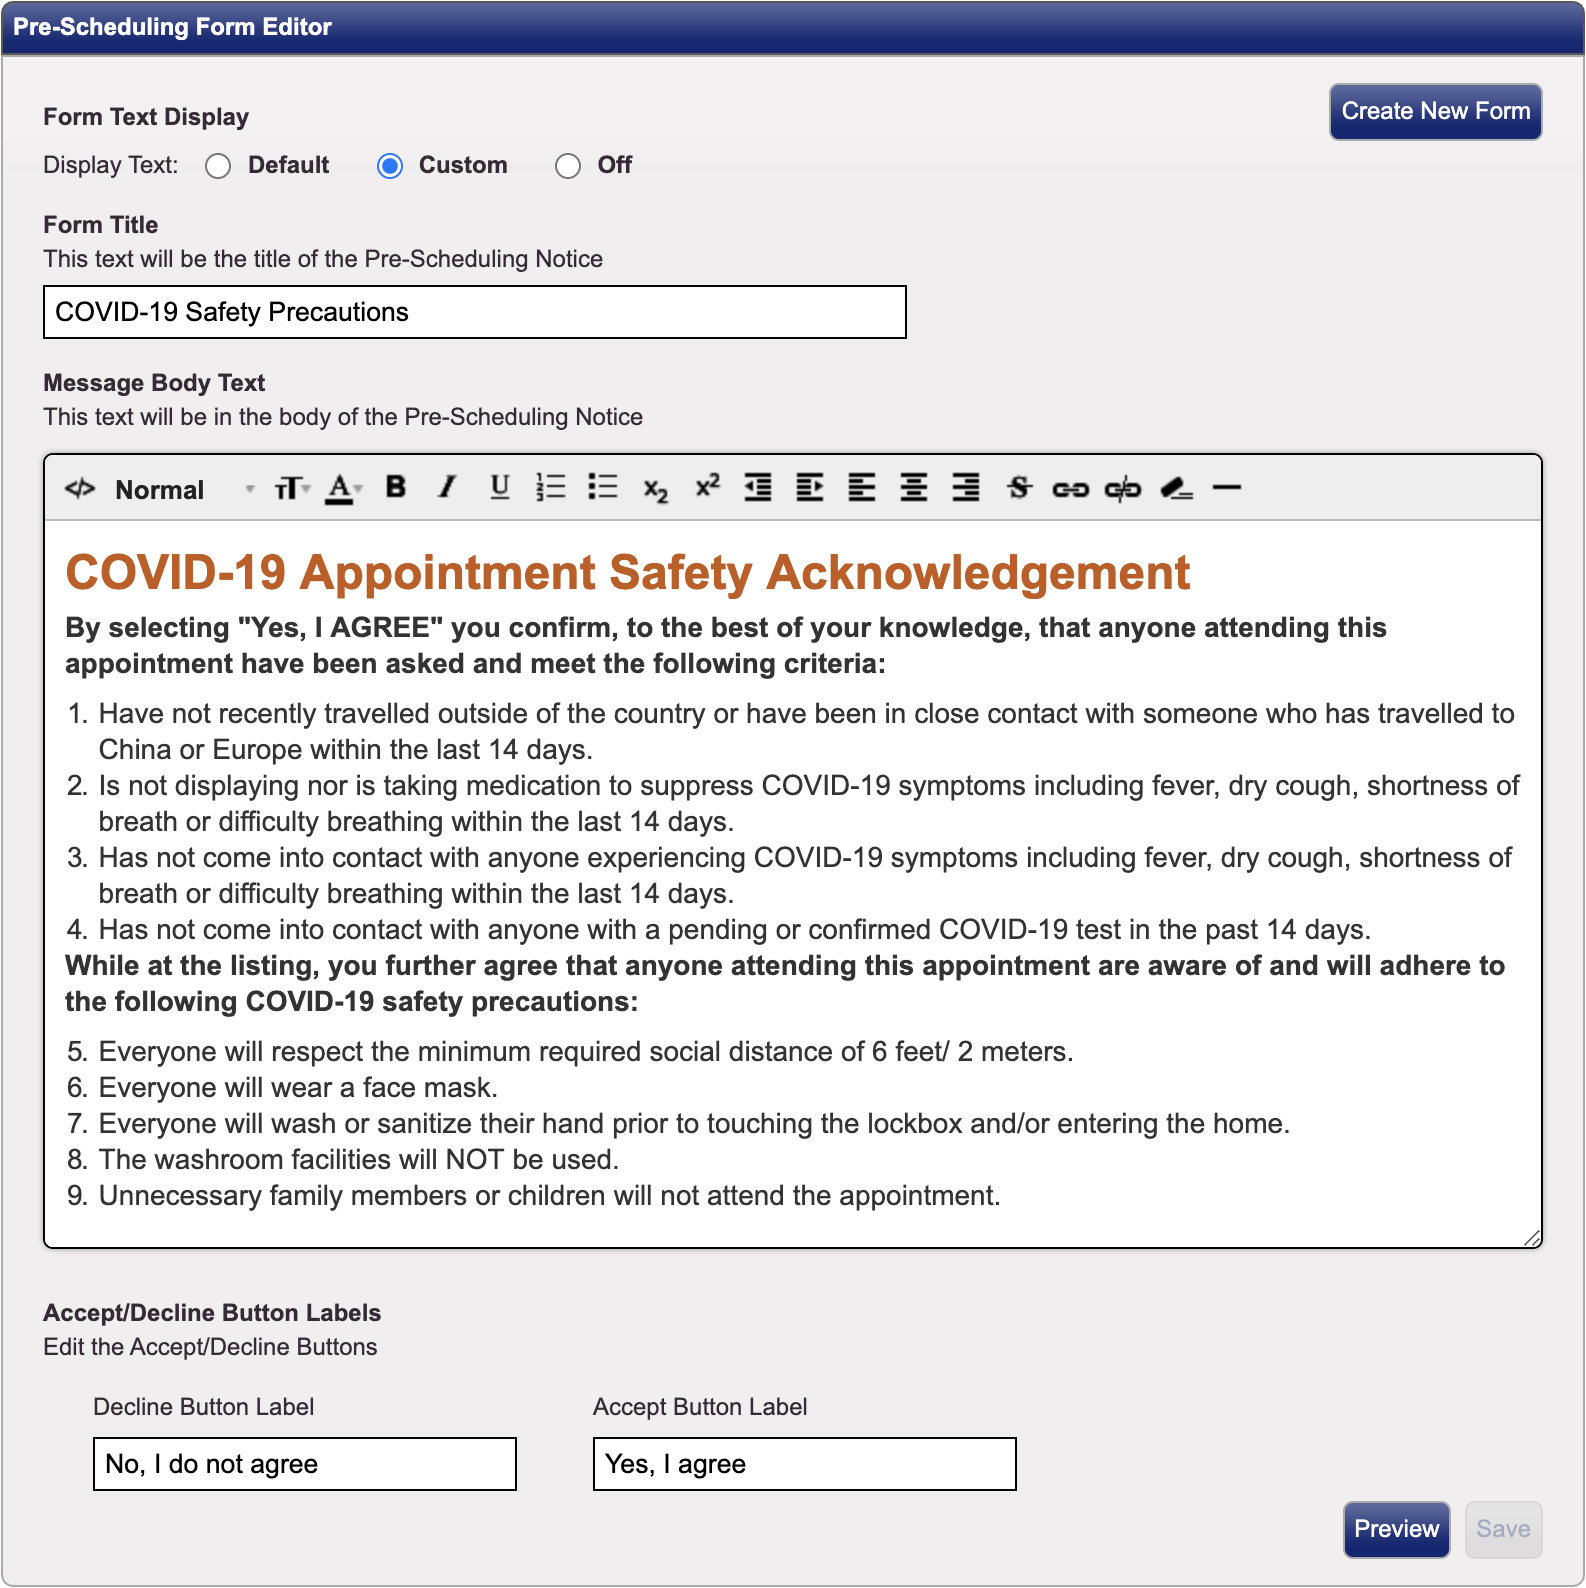
Let's take a look at the different sections of the form.
Form Text Display

There are three options. The default form will contain Covid-19 Appointment Safety Acknowledgment information. You cannot edit this form to change the details.
Custom will allow you to edit the form to add or remove details.
When you select custom, you will also have the option to create a new blank form.
You can also disable the form by selecting Off.
Turning the pre-scheduling form on or off will not affect appointments already in progress.
Form Title

This will be displayed at the top of the window that appears before an agent can schedule an appointment on a listing. It appears for desktop, tablet and mobile app users. The form title can be a max of 100 characters.
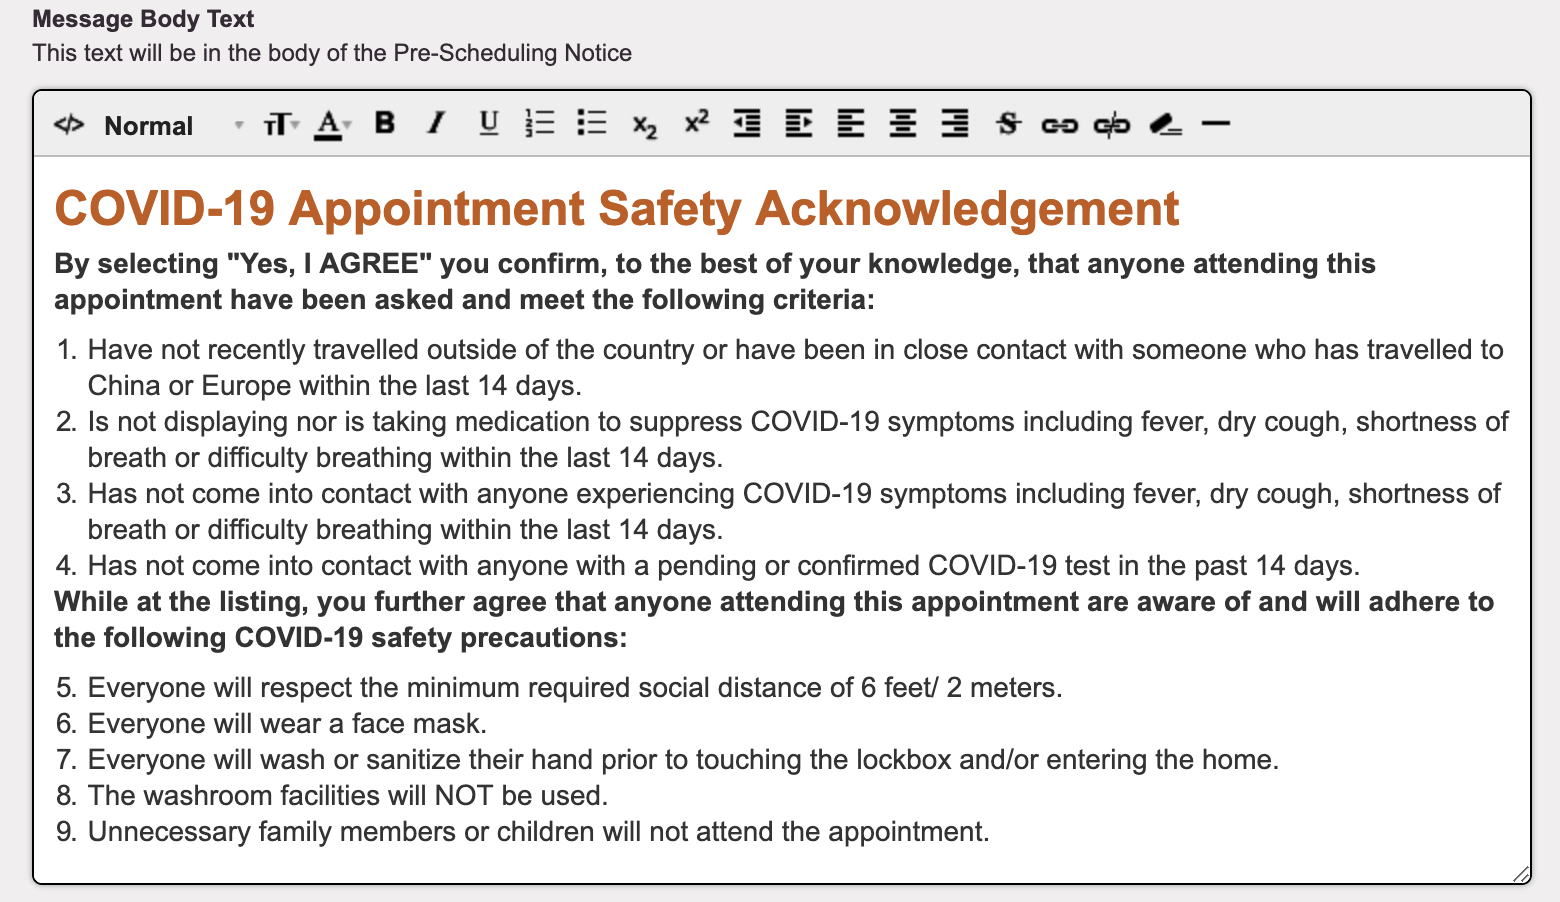
Message Body Text
This area will contain your message. You can add text to cover any pre-scheduling event. Please be aware that this form is displayed in the mobile app as well. Long content may be difficult to navigate.

The toolbar options include (in order from left to right):
- Raw HTML Editor
- Text Formatting buttons
- Font Size controls
- Font Color controls
- Bold
- Italic
- Underline
- Numbered Lists
- Un-numbered Lists
- Subscript controls
- Superscript controls
- Outdent controls
- Indent controls
- Justification controls
- Justify Left
- Justify Center
- Justify Right
- Strikethrough
- Add Hyperlink
- Remove Hyperlink
- Style Cleaner
- Horizontal Rule
Accept/Decline Button Labels
If using the Custom form option, you can customize the text on the labels. Each label can be a max of 50 characters.

When the agent presses the accept/ok button, the acceptance of the form text will be logged as part of the Activity Log for the listing. If the agent does not agree to the information provided, they will be returned to the scheduling request screen.
You will have the option to Preview the form. Save the form to enable the change immediately.
Frequently Asked Questions
- How can I create a custom form?
-
- Click on the Form Management menu option in the ShowingTime Front Desk Control Panel
- Toggle to Custom and begin editing the Default Form message provided by ShowingTime, or
- Click Create New Form to start a new Form from scratch.
- Enter the Form Title for your custom Form.
- Enter the message in the text box.
- Enter button labels for how agents will accept/decline your Form message.
- Click Save to save the form. The form will be applied to each showing request that comes through for your office.
- What if my office does not want to use a Pre-Scheduling Form?
- If an office does not want to use the Pre-Scheduling Form for incoming showing requests, they can easily turn off the form by toggling the Off button at the top of the Pre-Scheduling Form Editor.
Turning the pre-scheduling form on or off will not affect appointments already in progress.


