Creating Feedback Templates
Getting Started
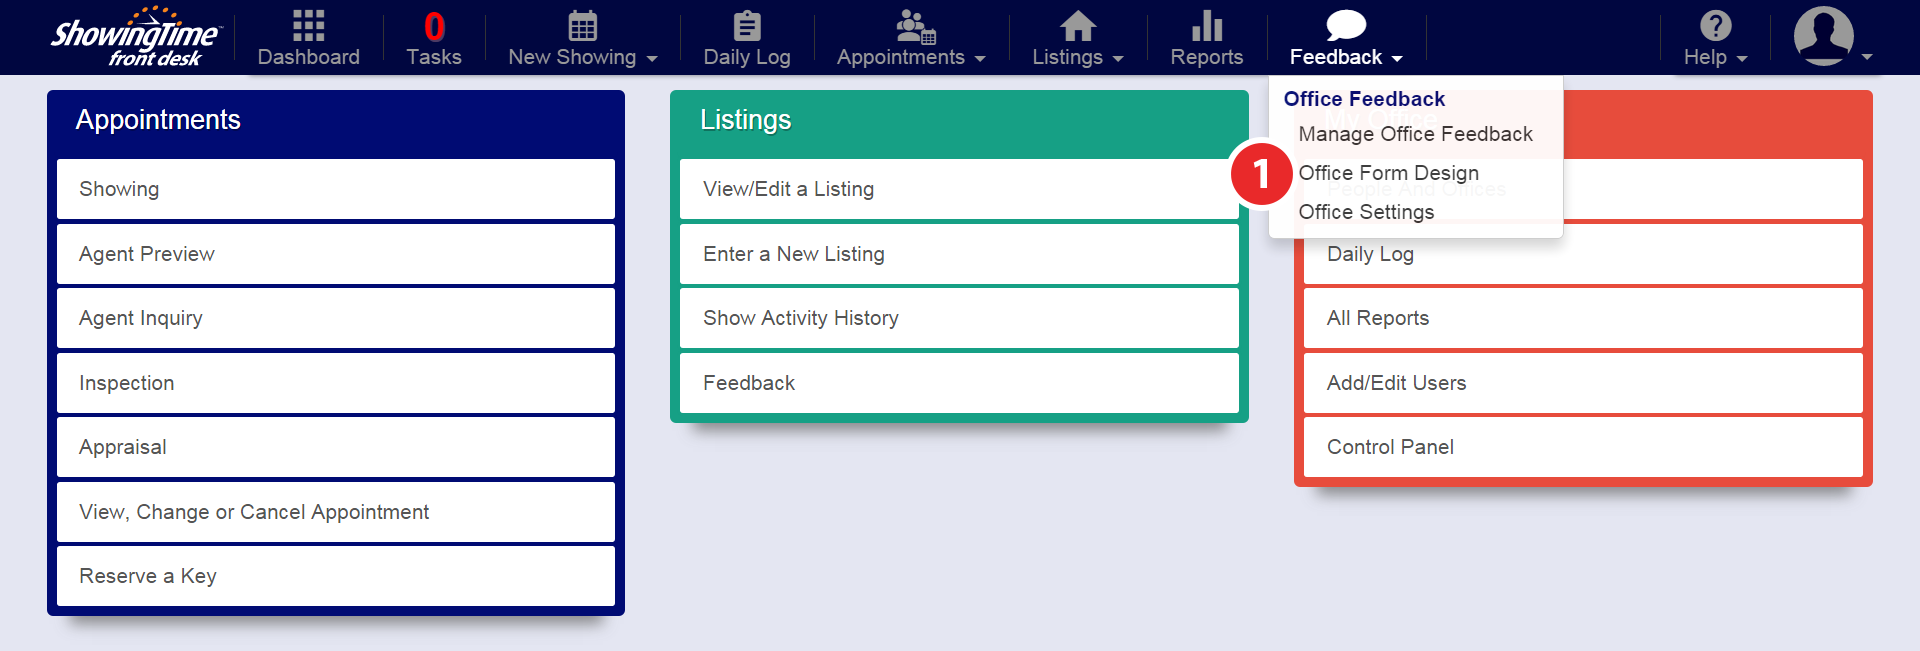
Step 1
Hover over the Feedback tab, then click Office Form Design
As an agent click on 'My Form Design'
Feedback Template Layout & Options
Feedback Templates can be created & configured on an office level and an agent level. Office level templates can only be modified by a user with office level settings. Agents can use predefined office templates on their listings or create & assign their own. The methods to create & update templates are the same on the office level and agent level. At the Feedback Form Design screen you will have the following options:


- Clone - allows you to copy the selected template.
- Rename - allows you to change the name of the template selected.
- Delete - removes the template selected.
- Create New Template - creates a new (blank) template.
- Preview Survey - allows you to see how the template will look with the chosen questions.
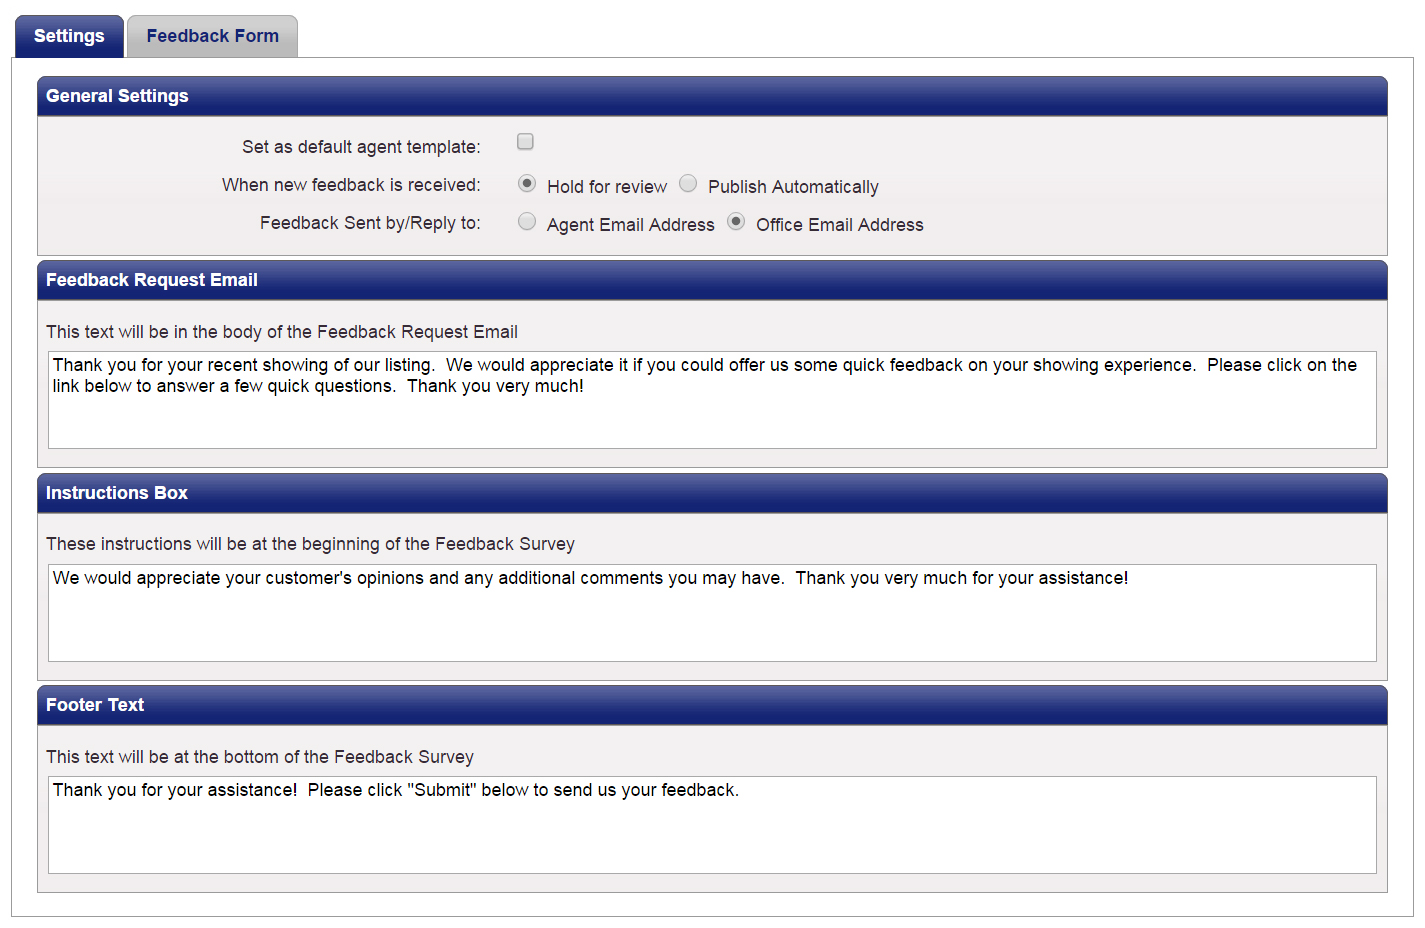
- General Settings - Basic settings for how feedback will be driven on the current template.
- Set as default agent template - This will set the current template as the default for all future listings. When a listing is imported from the MLS, that listing will use the selected template. Under the Feedback Template drop-down, the default template will be notated by an asterisk ( * ).
- When new feedback is received - This option changes how the system should handle new feedback, should we publish it automatically to your owner, or allow you to hold for review and manage the feedback yourself.
- Feedback Sent by/Reply to - This allows you to modify who the email requests are sent from/on behalf of.
- Feedback Request Email - This text will only be visible in the feedback request emails to the showing agent.
- Instructions Box - Instructions located at the beginning of the Feedback Survey.
- Footer Text - The text located at the bottom of the Feedback Survey.
For Agents: If buttons and input fields are grayed out, you more than likely are trying to edit an Office Template and you do not have Office Level Capabilities. If you clone the template you should have no further issues creating a template based on the currently selected Office Template.
Adding & Removing Questions
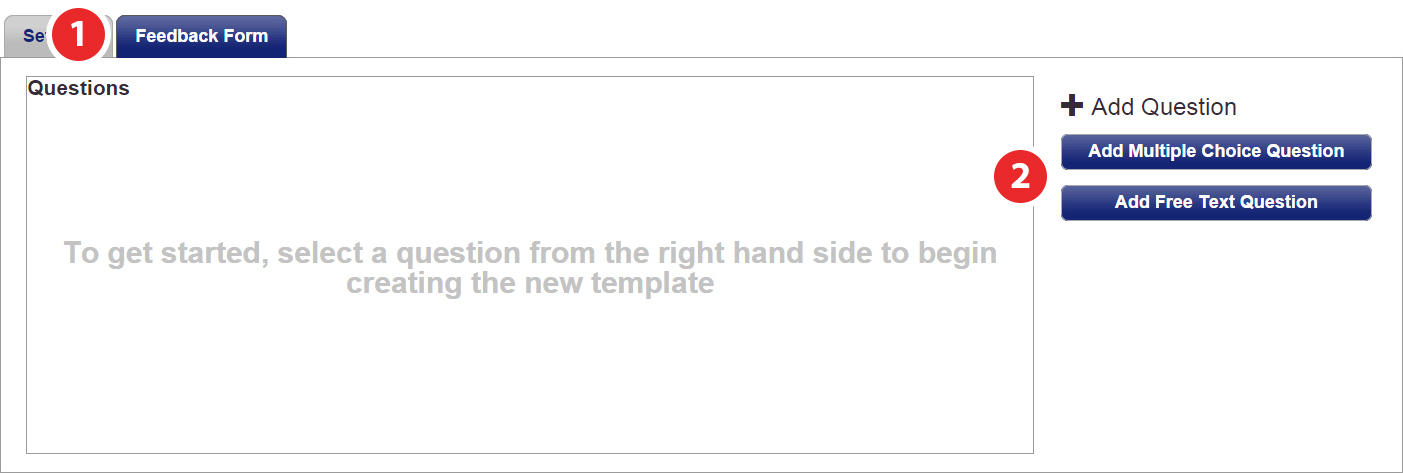
Step 1
Select the Feedback Form tab at the top.
Step 2
Choose either of the 2 available question types.
Multiple Choice Questions

Multiple Choice Questions should always start with the question at the top. Any number of responses can be added or removed using the buttons located to the right of the response section.
Free Text Questions

Free Text Questions can be any question that you would like the agent to provide a detailed response to. Try to keep these questions open-ended to provoke more than a yes or no answer.
Removing Questions
 - Selecting this icon will remove any unwanted questions from the template.
Re-ordering Questions
 - When your cursor changes to this you can click and drag to reorder the questions.
Adjusting the Feedback Request Frequency
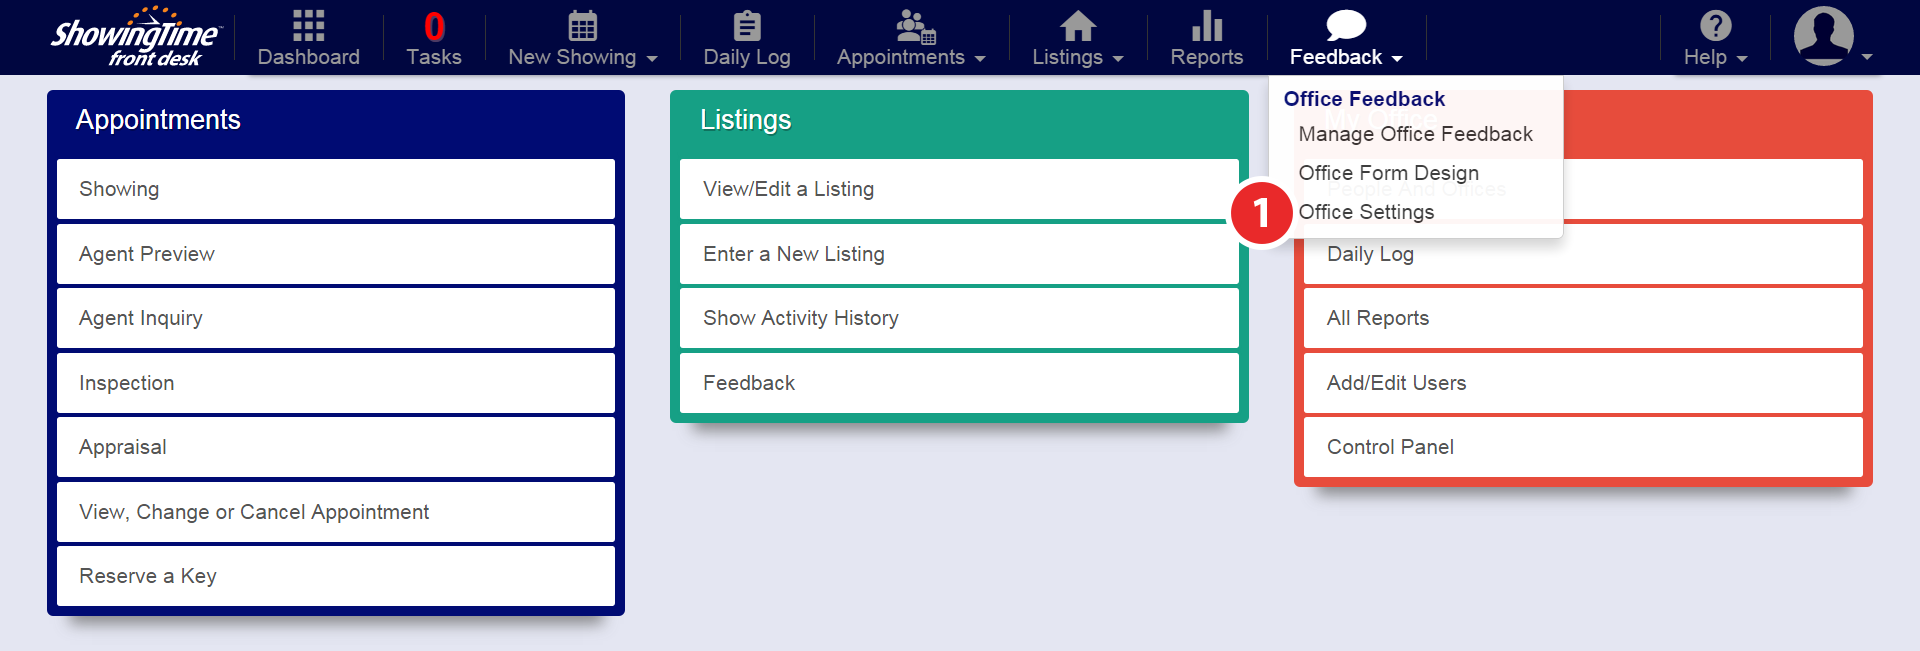
Step 1
Hover over the Feedback tab, then click Office Settings
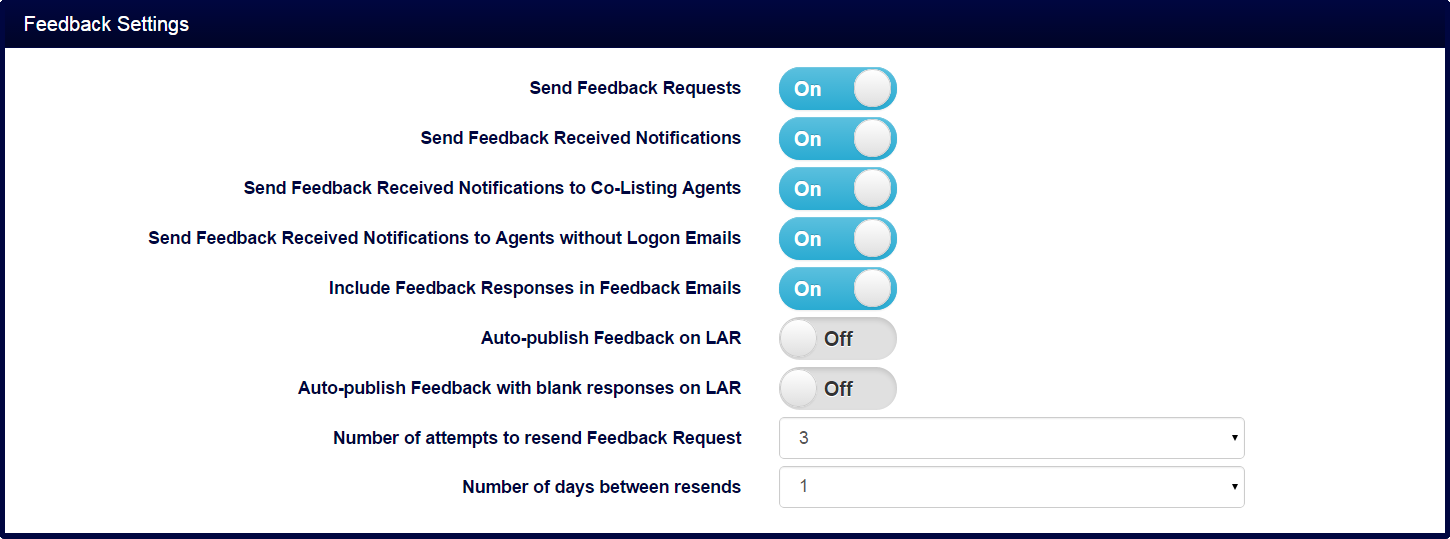
You will be presented with the option to control all feedback settings. By default, the 'Number of attempts to resend Feedback Request' will be set 3 times, but you can adjust this accordingly.
Assigning a Template to a Listing
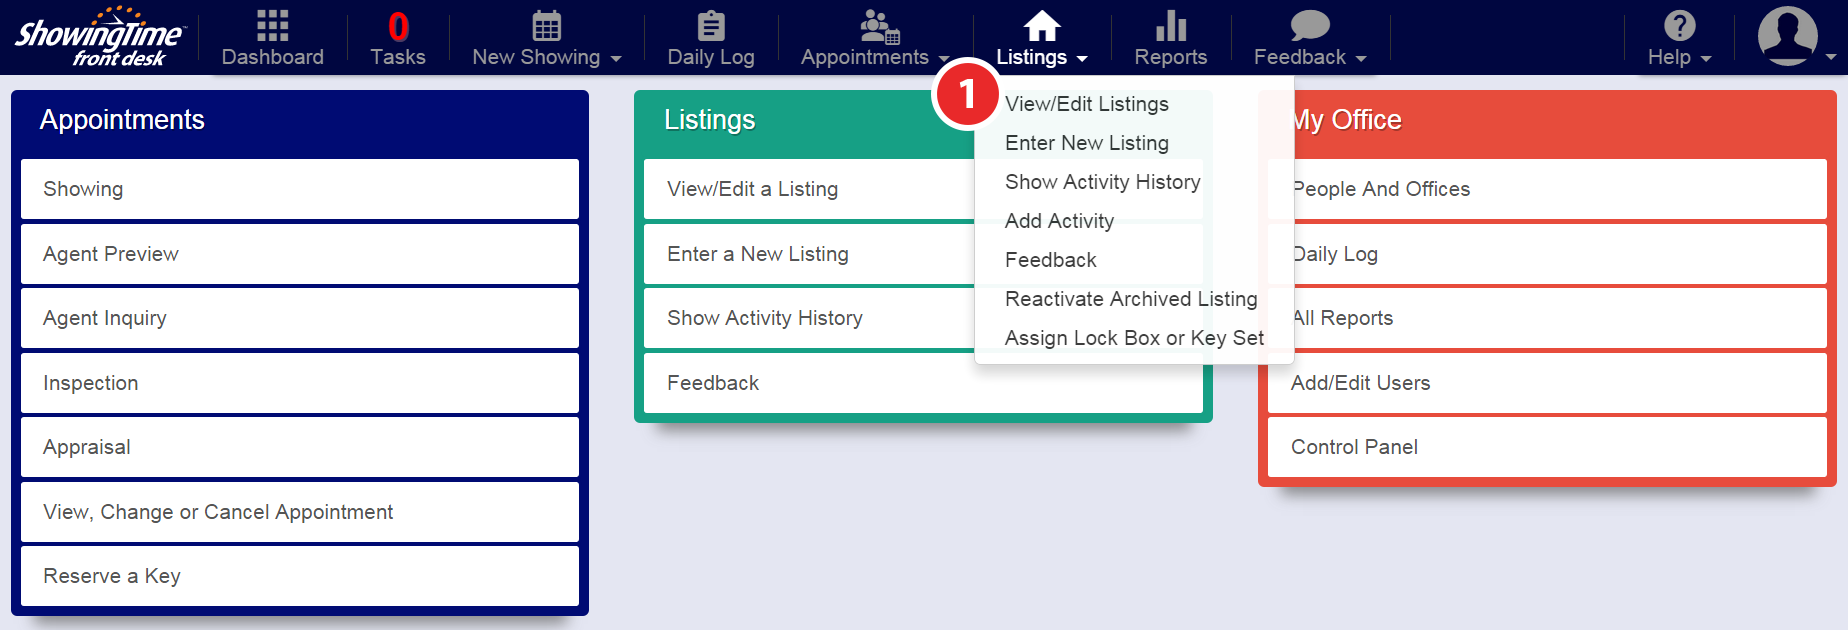
Step 1
Hover over the Listings tab, then click View/Edit Listings

Step 2
Select the Listing for which you want to assign the feedback template on

Step 3
Under the 'Appointment Settings' section, you will see the Feedback Template option. Use the selector to choose the feedback template you would like to assign to the listing.


