Entering an Appointment
- Entering an Appointment
- Advanced Search
- Appointment Types
- ShowingCart™
- Mobile Scheduling using the ShowingTime App
- Email Notifications
Getting Started
ShowingTime has made it simple and easy to schedule a showing through FrontDesk. The steps below apply to a listing with an appointment type that requires confirmation with any of the contacts.
Note: Scheduling steps will vary depending on appointment types and your notification preferences set up.
Step 1

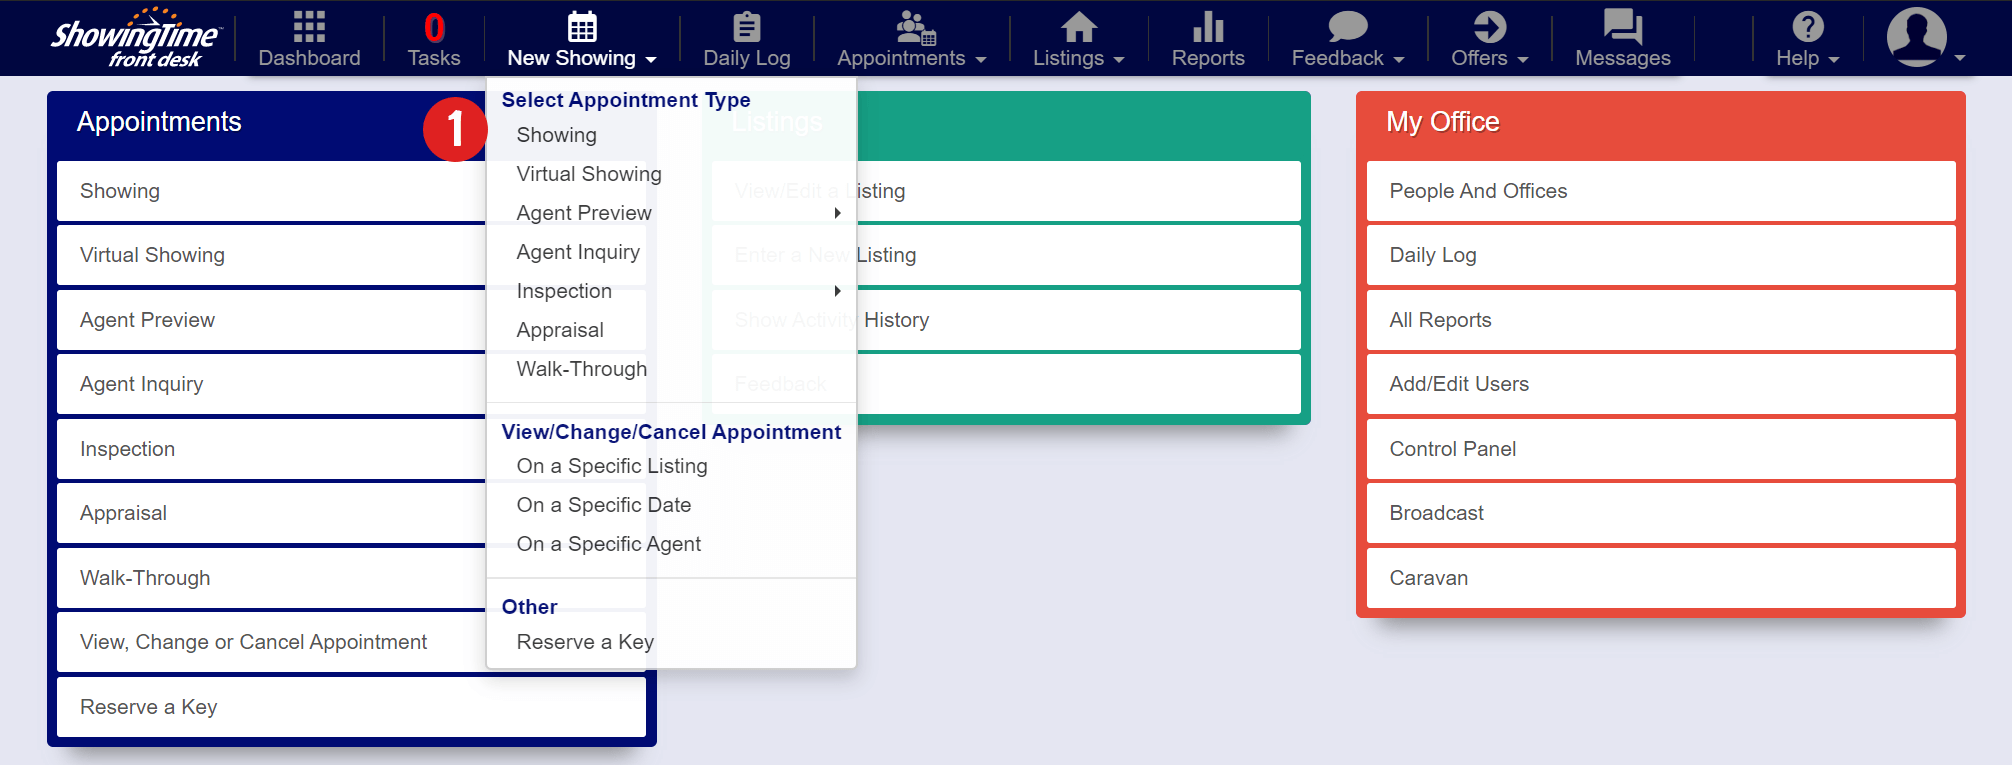
Hover over the New Showing tab, then click Showing in the drop-down. You can choose from different Appointment Types
(Alternately: Clicking 'showing' on the homepage will link you to the same screen)
Step 2

Quick search allows the appointment scheduler to filter listings by the listing's street name, address, listing ID or Listing address.
Advanced Search has additional fields to search by. It is used when the buyer's agent has a different identifier such as:
- Address
- Subdivision
- Market
- Listing ID
- Agent ID or Names
- Owner Name
Note: The Market is the name of the Multiple Listing Service the listing belongs to when the listing may appear in more than one listing service.

Advanced Search also allows the scheduler to filter listings based on their status:
Step 3

Search for the buyer's agent making the request by their name or agent ID, then click on their information in the results
Step 4

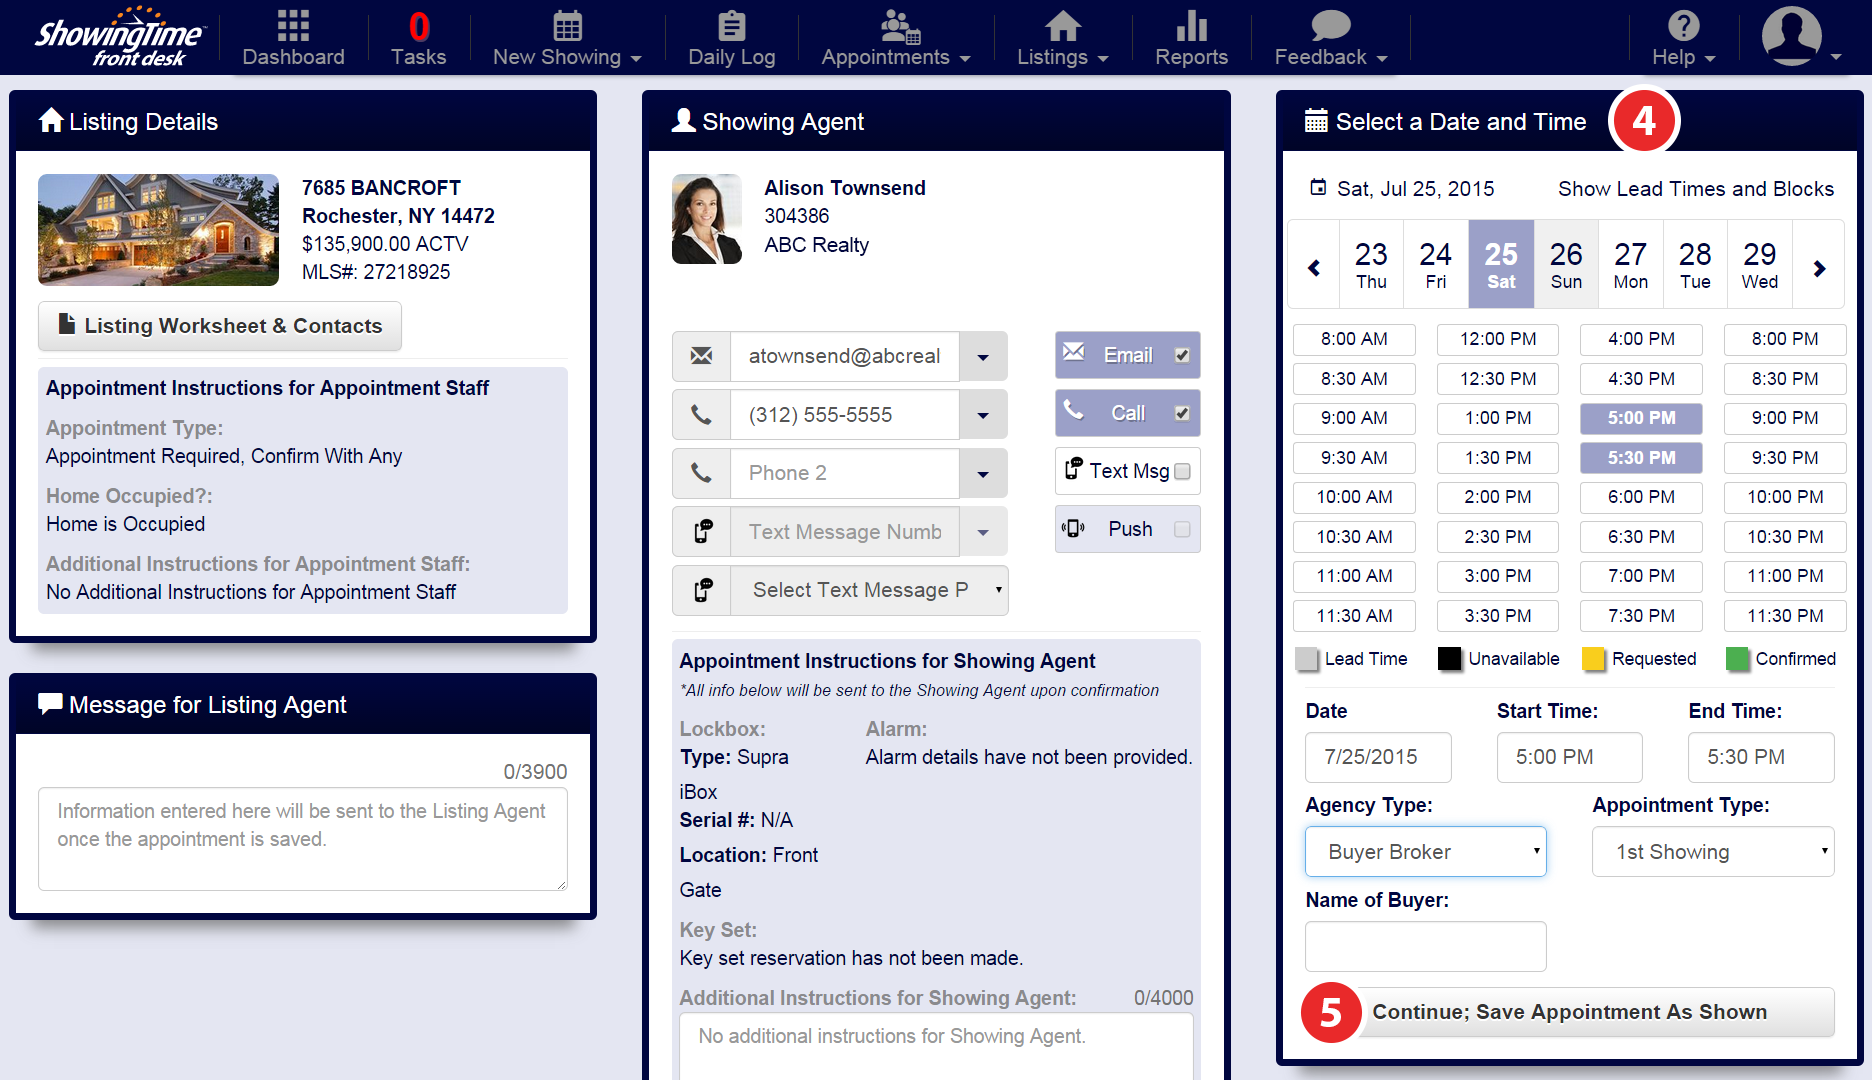
Select the date and time
Step 5
Verify the appointment details, then click Continue; Save Appointment As Shown
Step 6

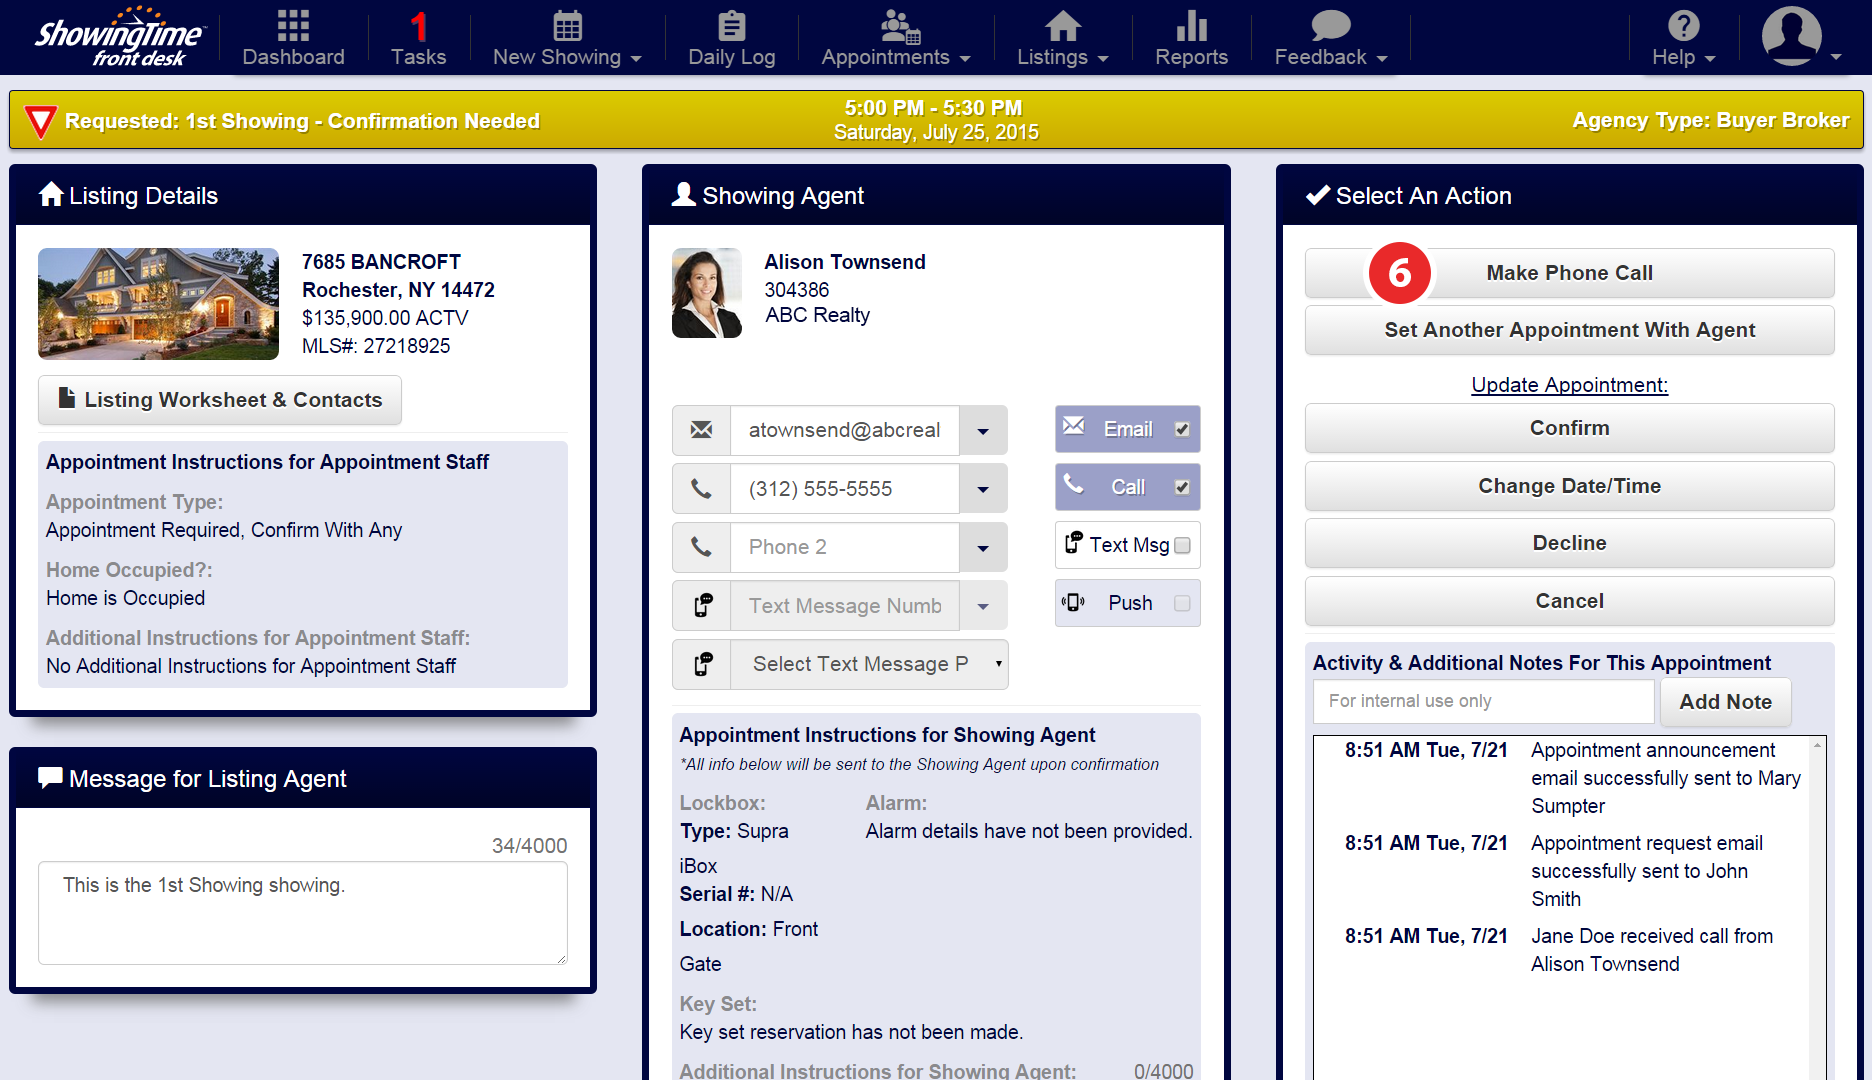
Notice the yellow bar at the top since the request has not been confirmed yet. Select an action.
Step 7

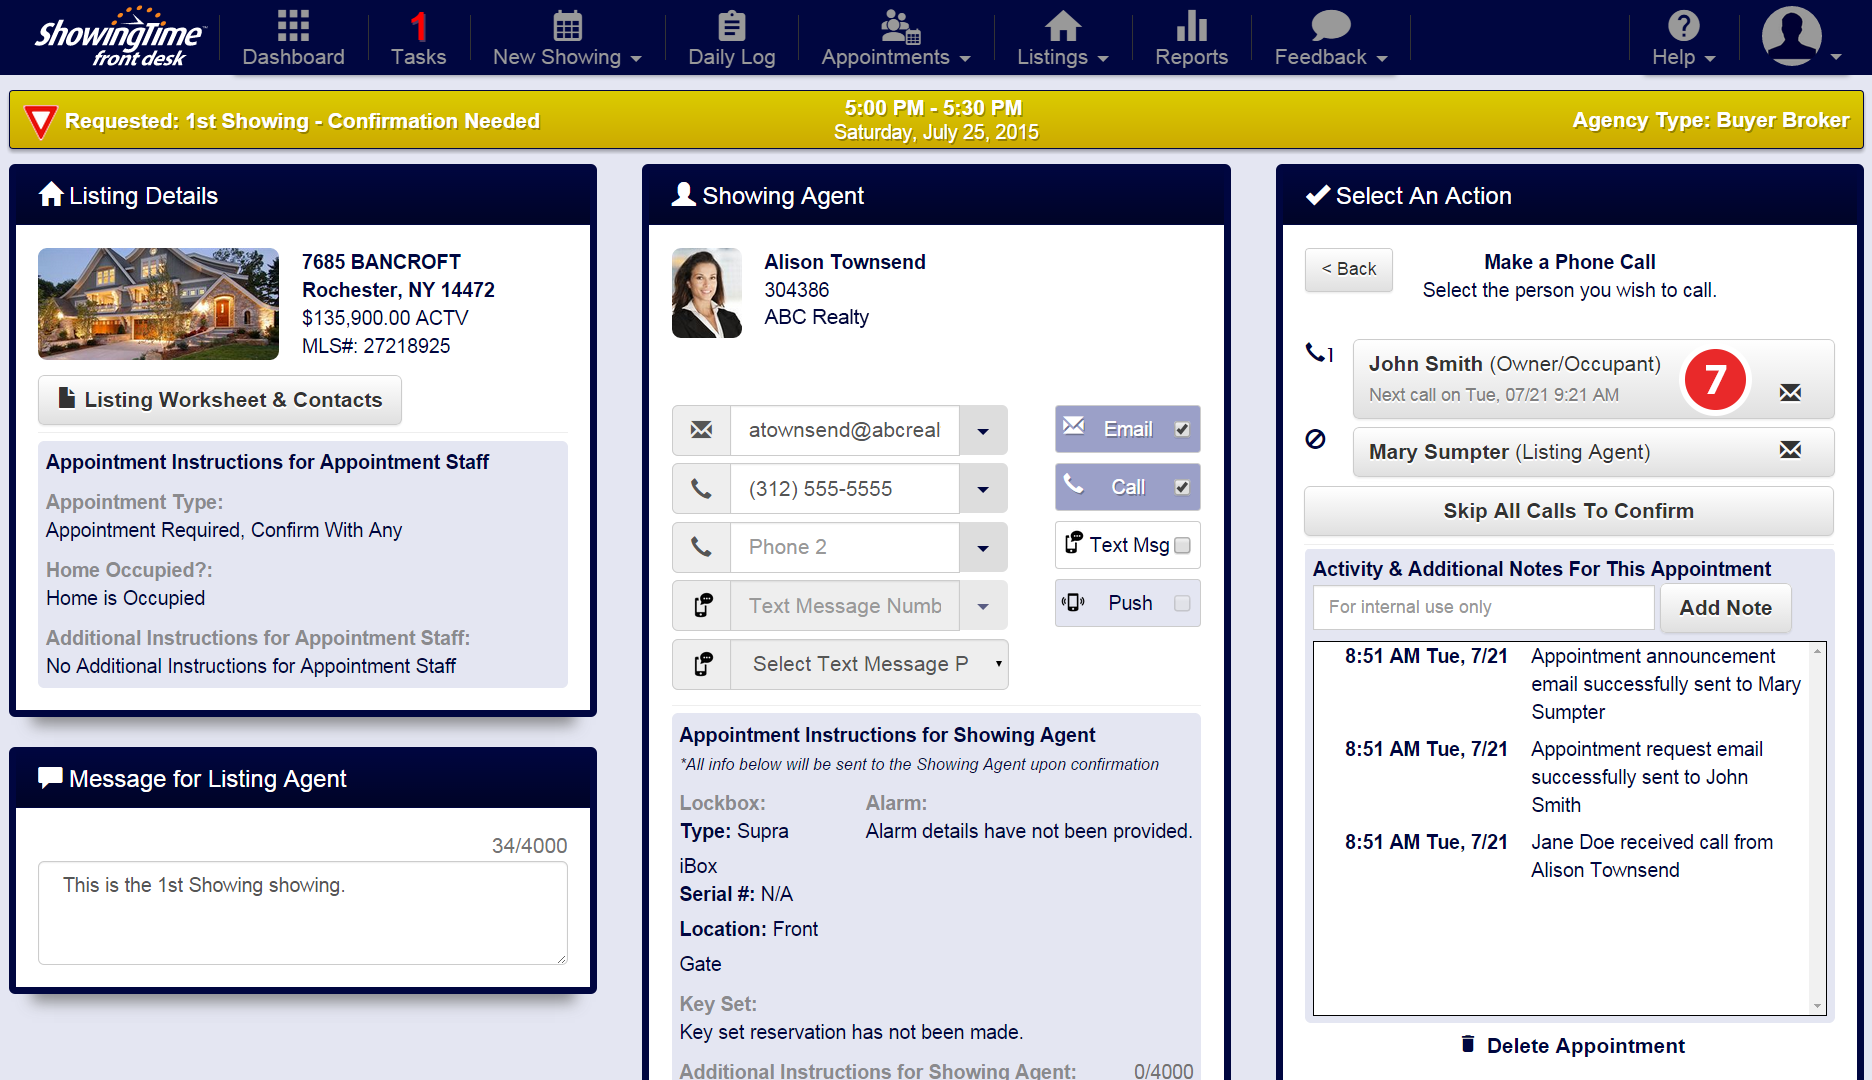
FrontDesk will prompt you with the next step that needs to be performed. Select the person you wish to call.
Note: If you select "Skip All Calls to Confirm" you will be prompted to confirm this action and be taken to step 10.
Step 8

Log what happened on the phone call.
Step 9

Add any notes regarding the call and click Submit.
Step 10

Notice the status changed to confirmed, but the tasks are not completed. FrontDesk will prompt you with the next step that needs to be performed. Select the action.
Step 11:

Log what happened on the phone call.
Note: If you select "Skip Call to Showing Agent" you will be prompted to confirm this action which will complete all tasks for the appointment.
Step 12

Add any notes regarding the call and click Submit.
Step 13

Notice (in the image above) that the task count is back to "0" because the scheduling tasks are now complete.


