QuickStart Guide for Agents
Configuring an Owner to Receive Feedback
Owners currently can only receive feedback via email or through the ShowingTime App. For an owner to receive feedback, they need to be configured properly on the listing for which you would like to provide them with the feedback.
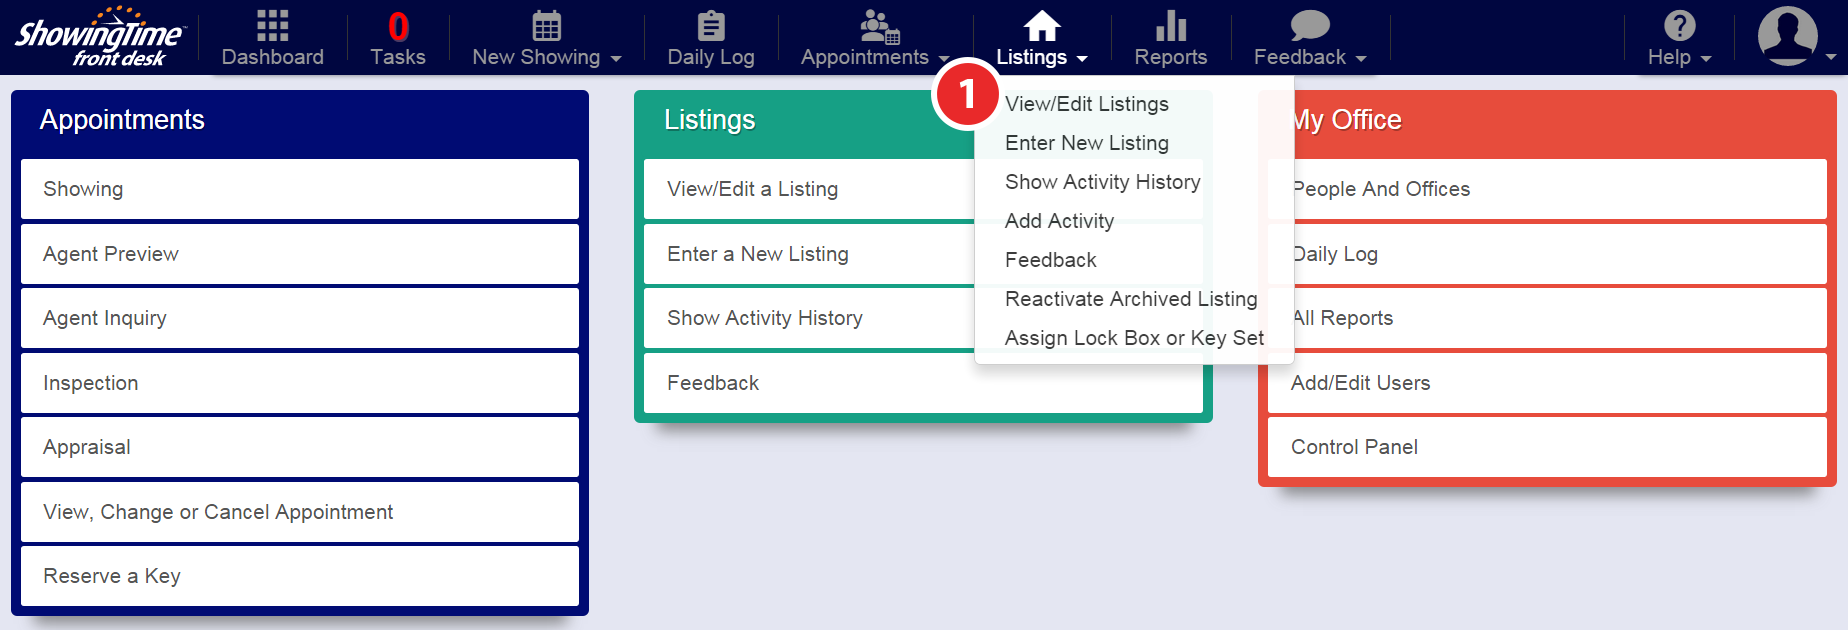
Step 1
Hover over the Listings tab, then click View/Edit Listings

Step 2
Select the listing for which you want to configure the owners to receive listing feedback on

Step 3
In order for an owner to receive the feedback, they must first be set up as a contact for the listing and they need a valid email address added to their information to send it to. If the owner has not been added to the listing yet then click on the Add New/Owner/Occupant button.
Step 4
Once an owner is added, make sure they are configured to receive email notifications for Confirmed/Canceled Appointments
Publishing Feedback to the Owner (Hold for Review)
When first configuring your Feedback Settings, you chose to either publish feedback automatically or hold for review. If feedback is not being sent to your seller it's more than likely due to this setting being configured as hold for review. If you had feedback queued up to manually publish before choosing to automatically publish, you might still need to manually publish those feedbacks.
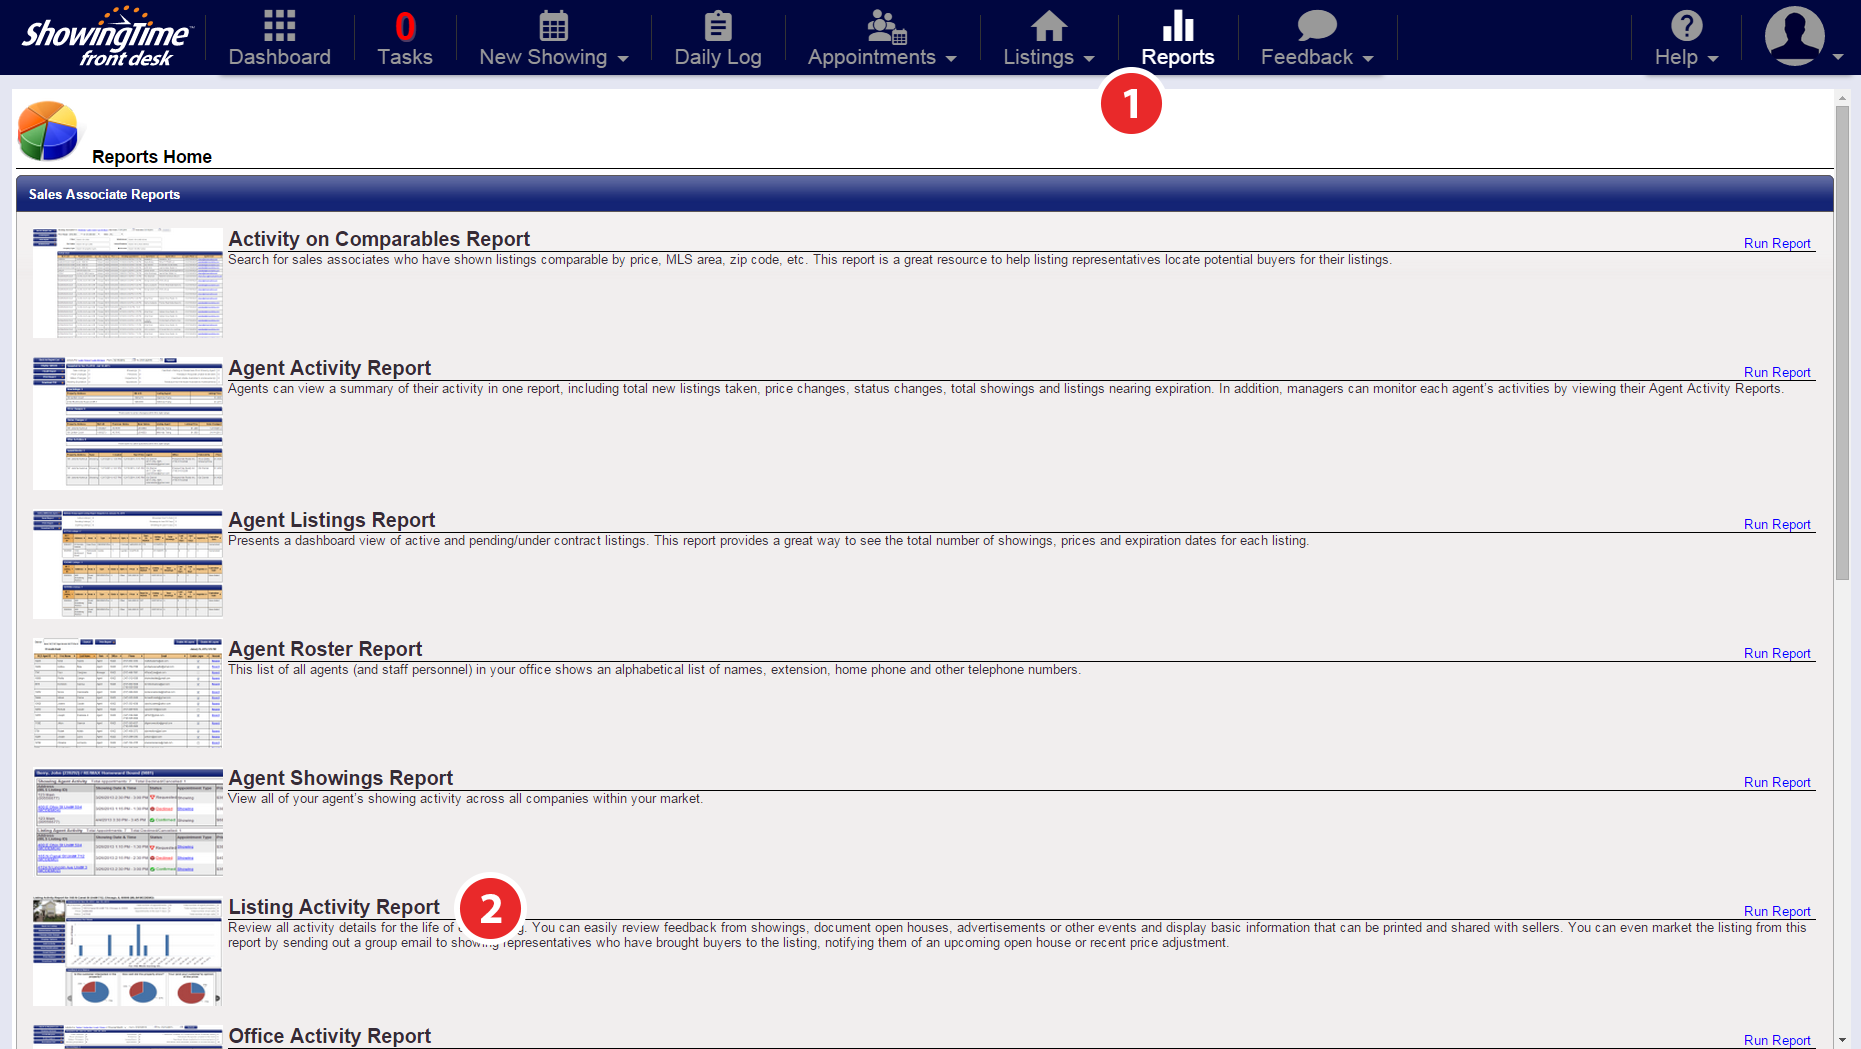
Step 1
Click the Reports tab
Step 2
Select Listing Activity Report from the list of available reports

Step 3
Then select the listing for which you want to publish feedback to the owner
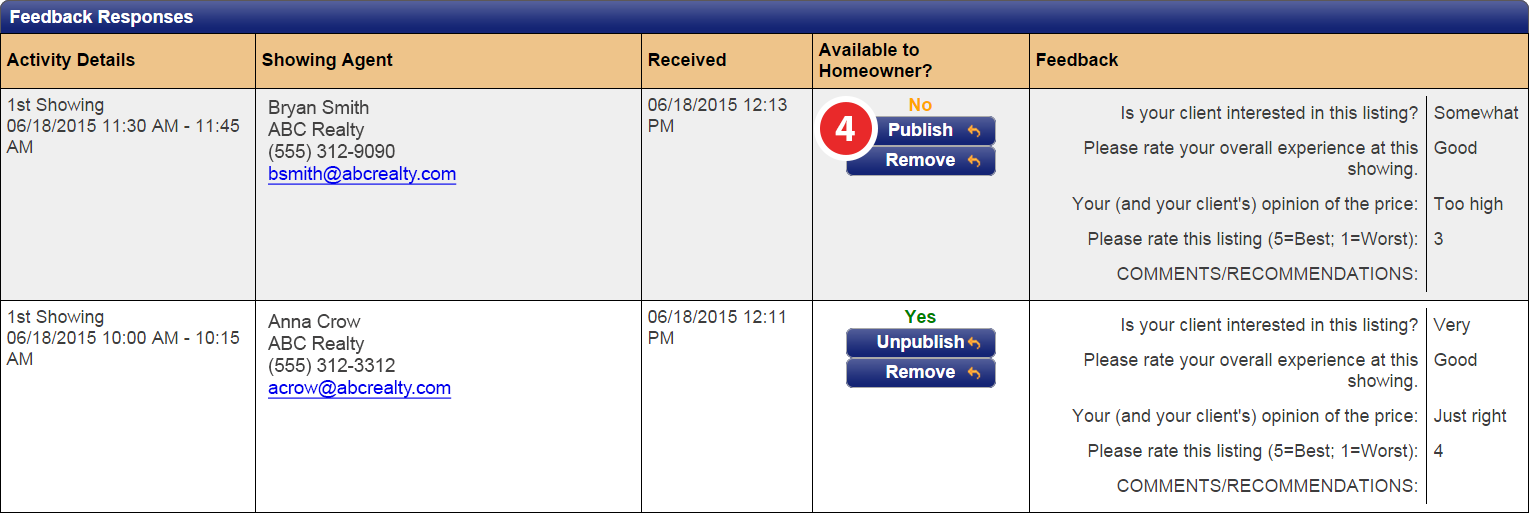
Step 4
Scroll down to the section labeled Feedback Responses. Under the section labeled Available to Homeowner? you will see a list of published & unpublished feedback responses. Click on Publish to immediately send that feedback via email to your owner and make it available on any listing activity reports generated in the future.
Manually Managing Feedback Requests
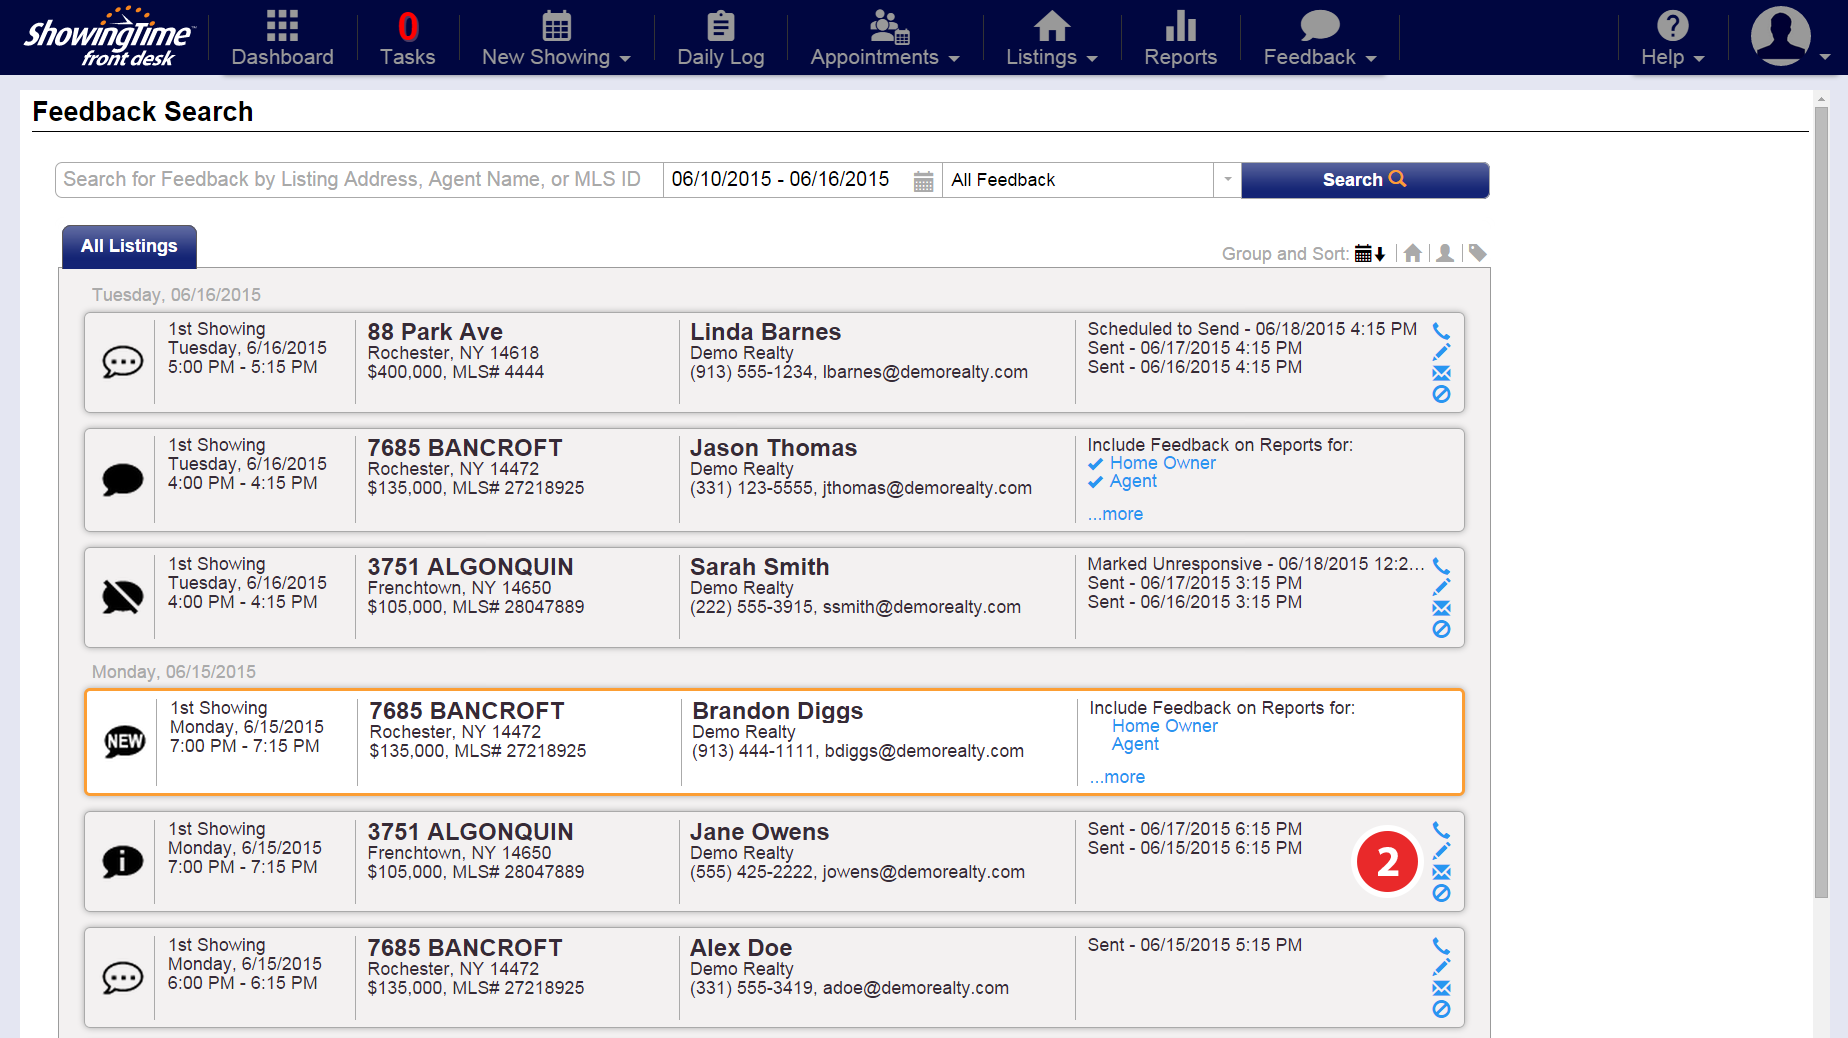
Sometimes agents don't respond to feedback requests or they might have answered the feedback in a non-traditional way (e.g. A phone call directly to the agent and not via the email request). As a listing agent, you have the ability to enter in the feedback provided by another agent yourself. There are also other options available to manage the feedback. You will be presented with the Appointment Date & Time, the listing for the feedback request, buyer's agent information for quick reference, and Feedback History, which is a list of when the feedback was sent when it will be sent, and any other note pertaining to the feedback.
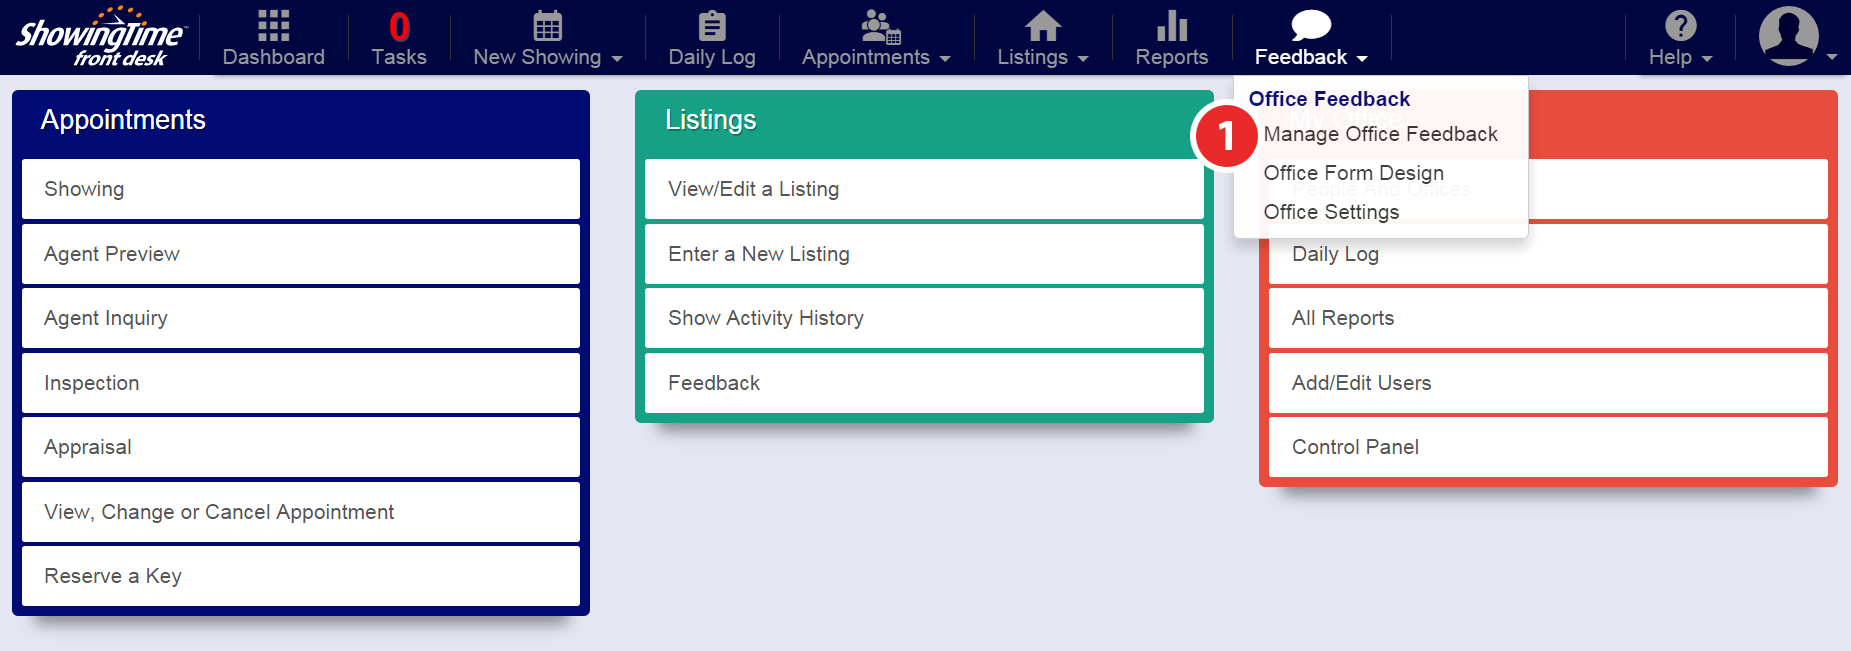
Step 1
Hover over the Feedback tab, then click Manage Office Feedback
Step 2
Select one of the icons to perform its necessary action:


Additional Feedback Features
ShowingTime has recently added some new and improved features to make it easier for you to view, manage, and organize your feedback.


Getting Started:
With training guides and easy-to-use tools, ShowingTime Front Desk provides what you need to manage your showings and listings.
Step 1
Set Up Your Profile:
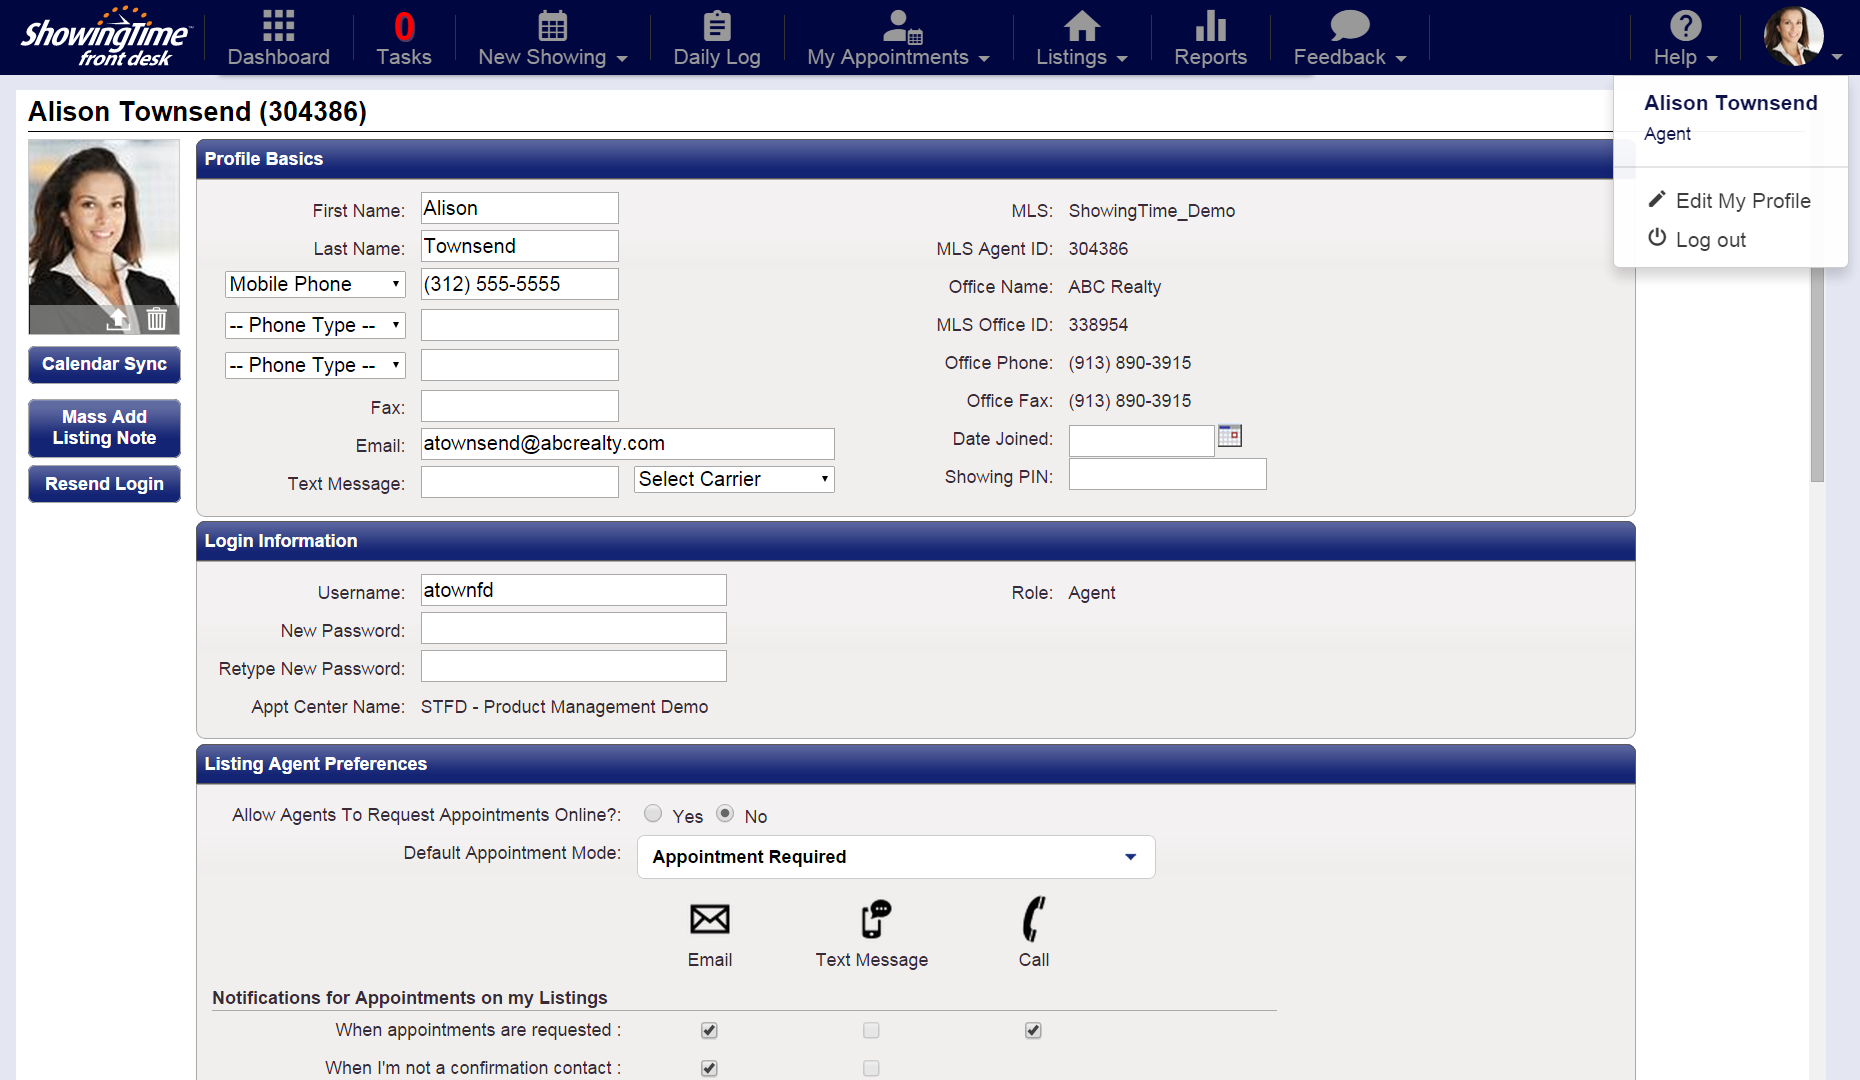
Please be sure that a valid phone number and email are set up for your account, in addition to your notification preferences. You'll also want to set up a custom password to further protect your accessibility.

- The ShowingTime Front Desk interface will show you the desktop version of the software. The main menu and grid-based layout provide a fast way to access many ShowingTime services.
- The ShowingTime for the MLS interface is a quick view of what matters most to you.
Showing Agents Preferences Default Appointment Length and Type
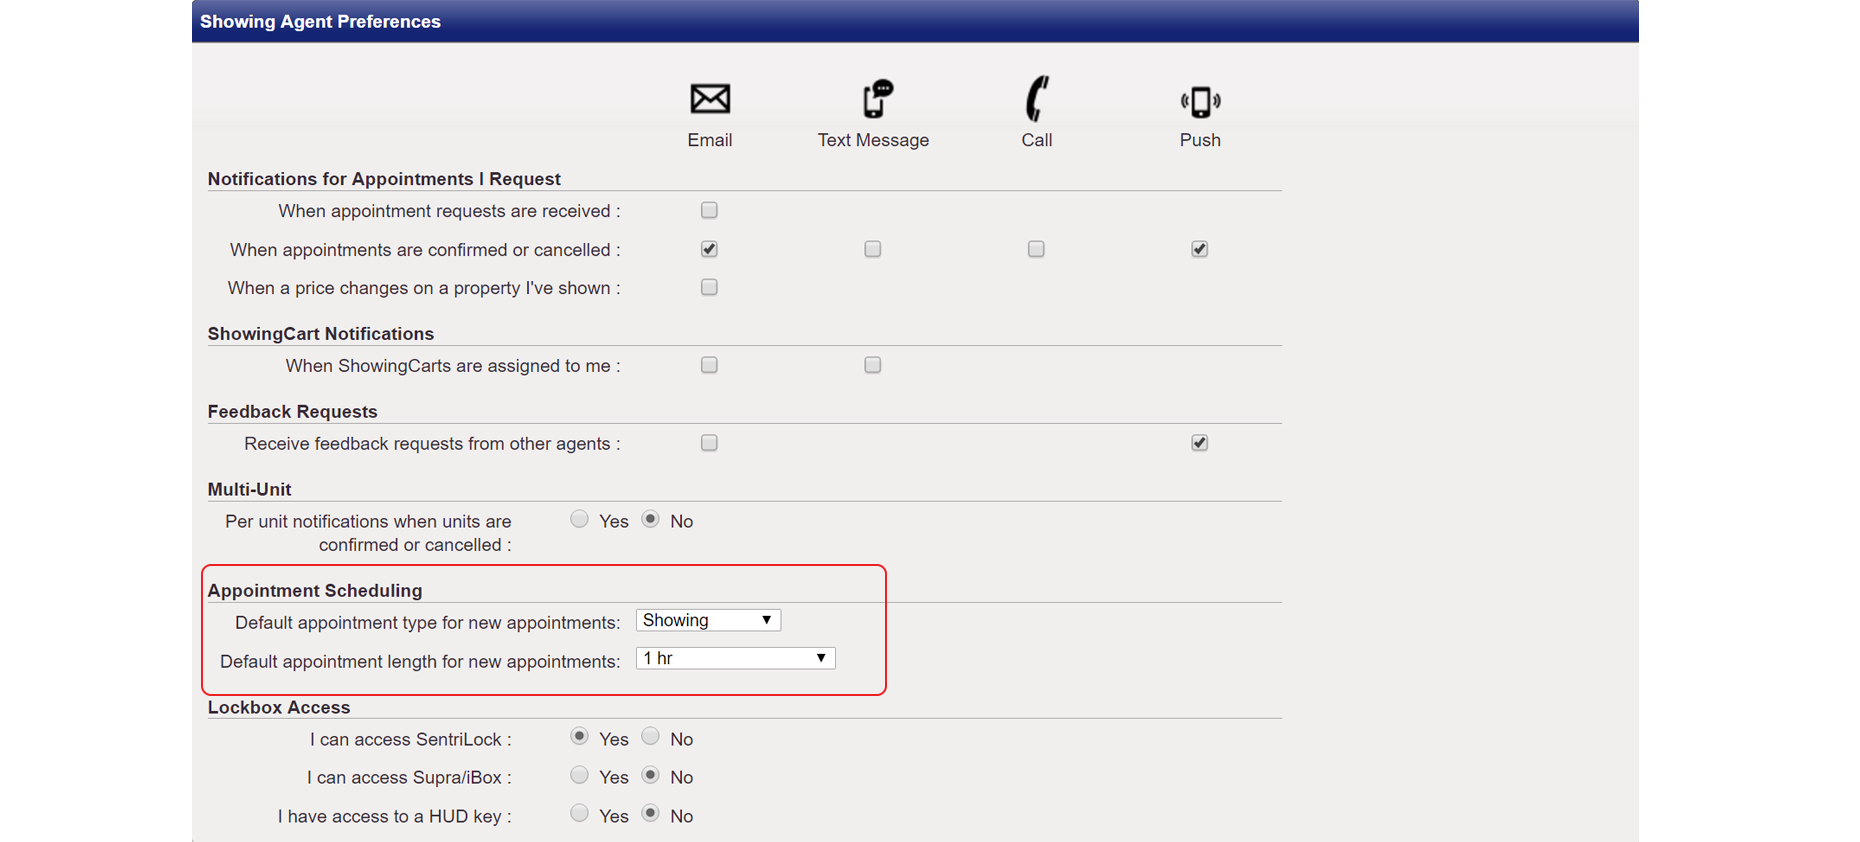
Whether you are an agent, an inspector, or an appraiser, setting up the default appointment type and length saves you time while scheduling. For example, if you prefer your appointments to be 1 hour-long, rather than spending additional time selecting a "showing" and "1-hour" duration from the drop-down menus while scheduling, you can set the defaults in your profile.
Price Change/Listing Notification
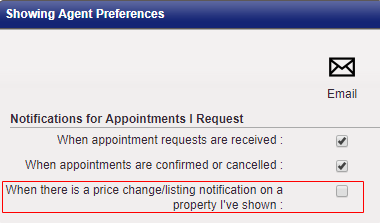
As a buyer's agent, you're set up by default to be notified of a price change or other updates on listings you've shown to your clients in the past 180 days. However, if you prefer not to receive these emails, you have 2 ways to opt-out:
1. Uncheck the box titled "When there's a price change/listing notification on a property I've shown".
2. Unsubscribe from any listing updates in the emails you receive. The "Unsubscribe" link can be found in the footer of these emails.

Step 2
Enter Showing Instructions:

Access your listings to enter or update the showing instructions. Make sure all information is entered clearly to ensure scheduling can be completed, contacts are properly notified, access to the listing is provided, and feedback requests are sent.
Step 3
Clear your Tasks:

The task number is generated by calls that still need to be placed. The remaining tasks include calls that need to be made later and listings that still need showing instructions added. Make sure your tasks are kept as close to zero as possible to ensure all of your office's information is complete and up-to-date.
Step 4
Schedule Showings:
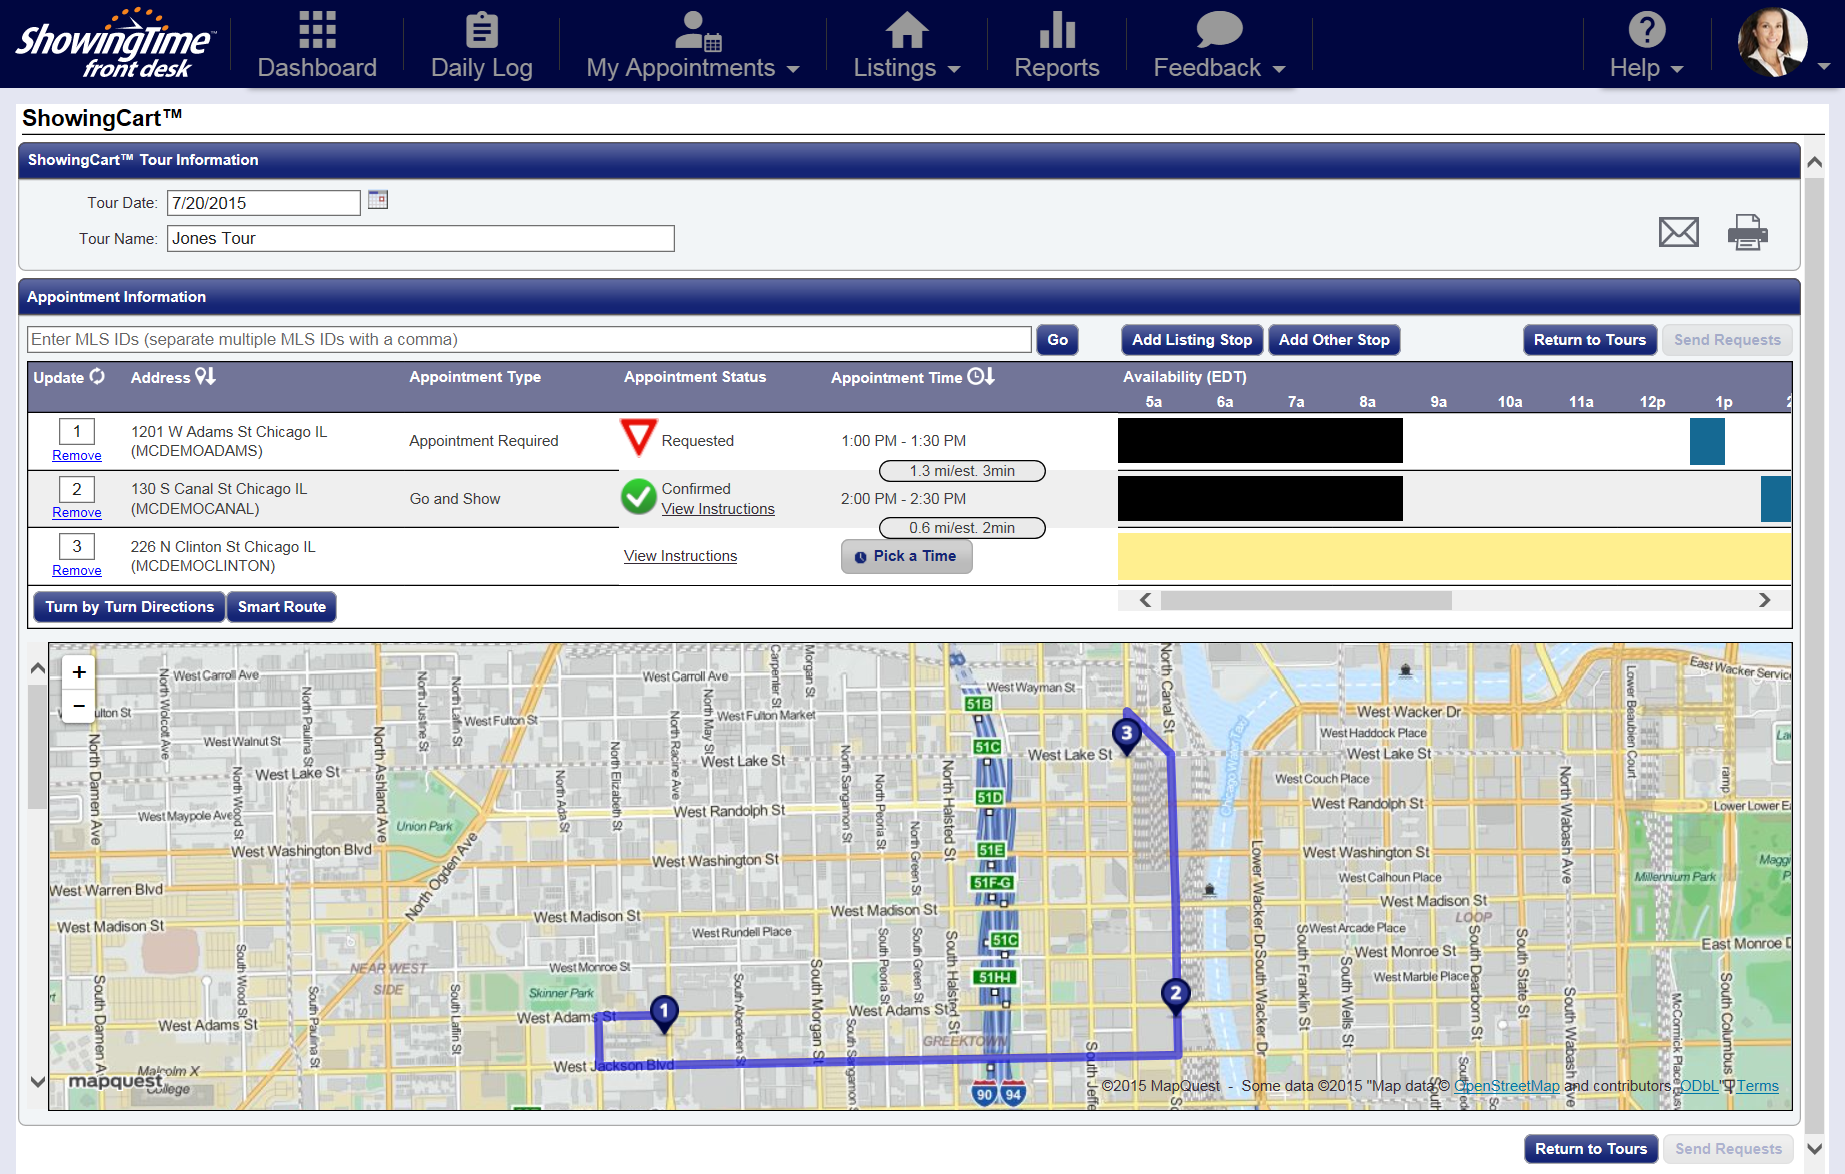
Easily request a showing or create a buyer's tour through our ShowingCart system. You'll also be able to manage requests that you have made or that agents have made on your listings.

Feedback can now be searched through a more streamlined search bar, including options for the date range and the type of feedback you are looking to manage. Going one step further, you can group and sort your search results by date range, street name, agent, or feedback status.


